To plan a beer festival as an organizer, work in one fixed order: permits and insurance first, then date and venue, then breweries and food vendors, then beer volume and budget, then ticketing and marketing, then staffing, and finally the event day itself. Licensing is the gate that can shut the whole thing down, so it starts the clock. Budget a six to twelve month runway for a first-time event, and eighteen months if you are chasing breweries that need to reserve production.
That is the honest version of the job. A beer festival looks like a party from the outside and behaves like a small food-and-beverage operation on the inside: cold storage, refrigeration load, age checks at the gate, cash reconciliation, and a floor plan that stops the queue from turning into a wall.
This guide is written for the people who actually have to do it: a first-year committee, a brewery marketing lead running a taproom takeover, a taproom operator hosting a charity fest, or a beer guild putting on its annual event. It assumes no ticketing software and no event company. Where rules differ by state, county or city, I say so, and where a number is a planning estimate rather than a fact, I label it that way.
If you only remember one thing, remember the order. Everything below hangs off it.
Table of Contents
- What You Need
- Step-by-Step: How to Plan a Beer Festival as an Organizer
- 1. Define the festival format, audience, and budget
- 2. Choose the date and venue: how to plan a beer festival as an organizer
- 3. Confirm breweries, vendors, and sponsorship commitments
- 4. Secure permits, insurance, and alcohol compliance
- 5. Build the ticketing, promotion, and sales system
- 6. Design the tasting flow and festival experience
- 7. Recruit and train the event team
- 8. Run the event and evaluate the results
- Common Mistakes
- Frequently Asked Questions
- How far in advance should I plan a beer festival?
- How many beer styles should a festival offer?
- Do beer festivals need special insurance?
- How should I manage alcohol service responsibly?
- Do I need a liquor license to run a beer festival?
- Conclusion
What You Need
You cannot promote until you know whether the event is legal, how many people the site holds, and whether breweries have committed. Ten items come first, and each one has a clear finish line.
| Item | Why it gates the rest | You are done when |
|---|---|---|
| Event concept | Drinks attendance, brewer recruitment and budget | One sentence naming the audience, format and beer focus |
| Attendance target and cap | Every cost and every pour calculation depends on it | A number and a hard ceiling written down |
| Working budget with contingency | Upfront costs usually land months before ticket revenue | A costed sheet with a 10 to 15 percent reserve |
| Permits and alcohol authorization | Without them there is no legal sale and no tickets | Approval in writing from the issuing authority |
| Insurance | Venues and breweries will both ask for certificates | Coverage bound and certificates collected |
| Venue with a hold | Dates, capacity and power set the whole build | Signed agreement with a capacity figure in it |
| Brewery commitments | The beer list is the reason people buy a ticket | Signed agreements from a target number of brewers |
| Food and zero-proof vendors | Water and food are safety and satisfaction items | Signed agreements covering the full session hours |
| Ticketing system | Capacity control and revenue collection | A tested sale and check-in flow with a manual backup |
| Staffing plan | You cannot staff a bar, gate and cellar with friends | Every shift filled or covered by named volunteers |
| Safety and medical plan | Alcohol service, crowds and refrigeration all carry risk | A written plan with first aid, emergency contacts and an evacuation route |
The organizing tool you actually need is unglamorous: a single shared document tracking every commitment, who owns it, and the date it is due. Committee festivals fail on follow-up far more often than on ideas.
Step-by-Step: How to Plan a Beer Festival as an Organizer
Eight steps, in this order: define the format and budget, choose the date and venue, lock breweries and vendors, secure permits and insurance, build ticketing and promotion, design the tasting flow, recruit and train the team, then run the day and reconcile the numbers. Skipping ahead to marketing is the most common and most expensive mistake, because permits and capacity both take longer to obtain than anyone expects.
1. Define the festival format, audience, and budget
Start with a concept narrow enough to be a reason to come. A regional IPA showcase, a cask and cellar festival, a brewery taproom takeover, a charity fundraiser, or a two-day general release event are all defensible. A generic beer fest in a city with ten of them is not.
Set two numbers. The first is your attendance target, the realistic one. The second is the cap, the legal and physical one, which is usually lower. Plan the cap, sell toward the target, and keep the gap as your weather buffer.
Decide the ticket model early, because it changes almost everything downstream. A free-entry festival is funded by sponsorship, food margin and merch, and it needs far more marketing money. A ticketed festival pays for itself through the gate but adds age verification, refund handling and capacity controls. Ticketed with timed sessions gives you the tightest control over volume, because you can limit how many people are inside at once.
Build the budget as a cost-per-head figure multiplied by expected attendance, with a 10 to 15 percent reserve held back. Venue rental, staffing, cold storage and refrigeration, permits and insurance, sanitation and restrooms, entertainment, marketing, ticketing fees, printing and signage usually account for the bulk of it. Brewery participation should be free or low cost to the brewer, which means their beer is not a budget line for you.
Do the break-even math honestly. Divide total fixed and variable costs by ticket price to get your break-even attendance, then add twenty percent. If that number exceeds your venue cap, the concept is not financially realistic and needs to change before you sign anything. For a first event, the 300-person community festival and the 1,500-person regional show are very different businesses, and the bigger one is not the more impressive choice.
2. Choose the date and venue: how to plan a beer festival as an organizer
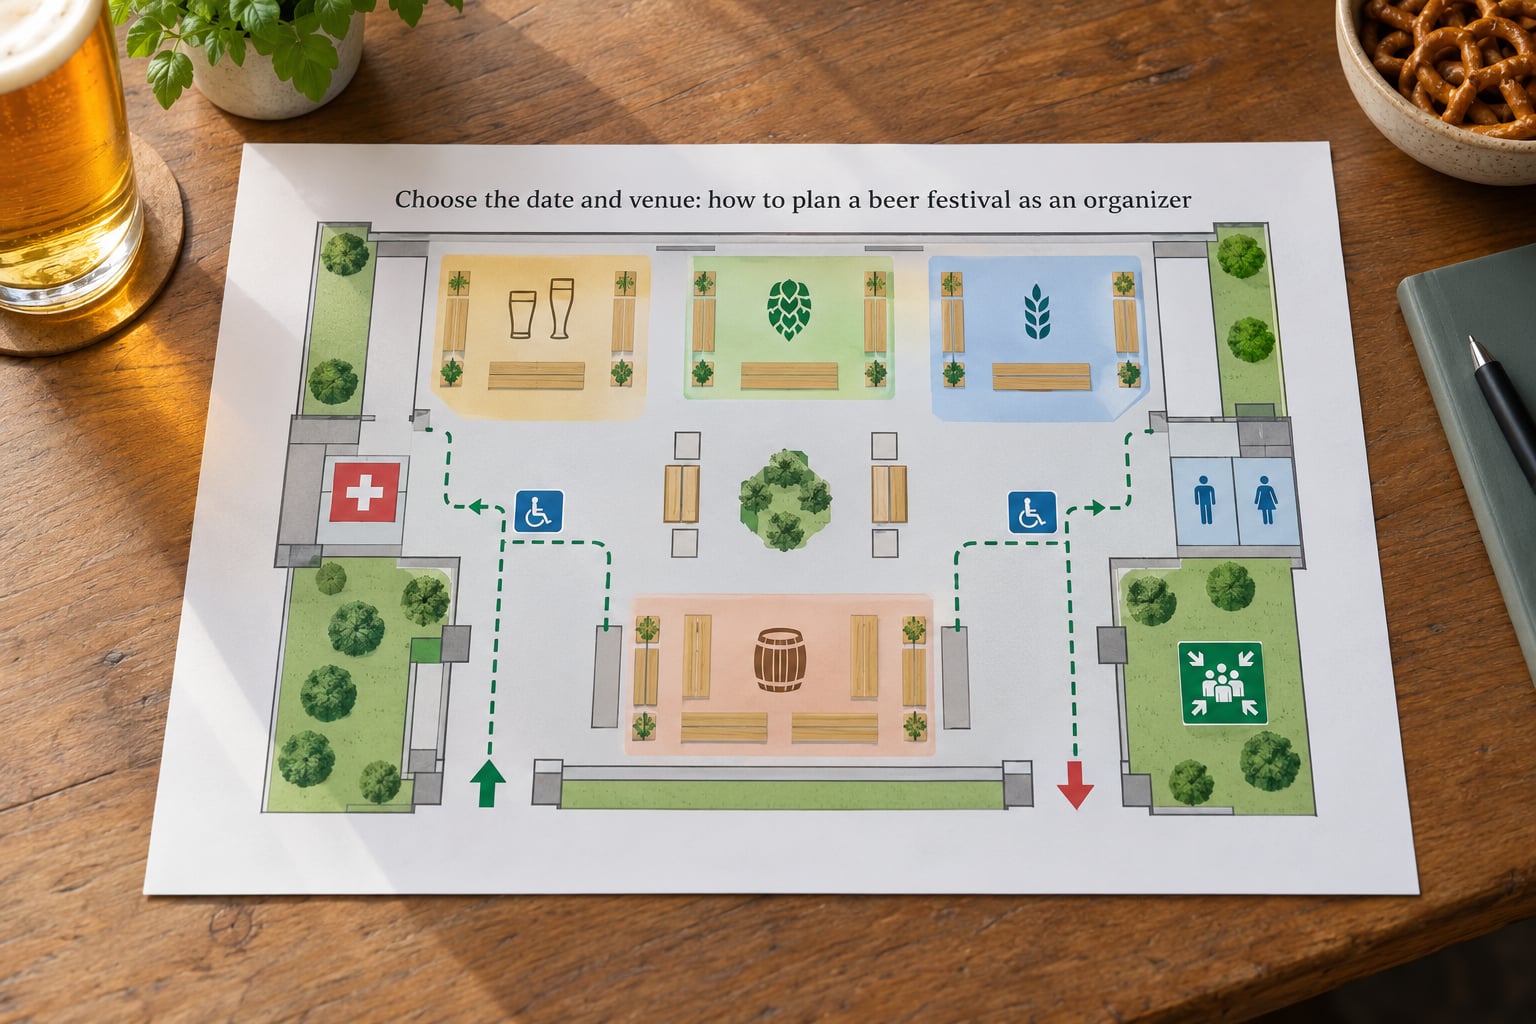
Date and venue are chosen together, and the venue usually decides the date. Taproom takeovers give you poured beer and a built-in crowd but cap you at whatever the room holds. Warehouse and civic spaces give you volume and freedom to build a floor plan, but you own refrigeration, power and sanitation. Hotel ballrooms are predictable and easy to staff, with a food-and-beverage minimum that can quietly anchor your budget. Outdoor sites are the most appealing to attendees and the most exposed to weather, noise and neighbors.
Check these before you sign anything: certified occupancy and whether it includes standing areas, transit or parking for the whole session window, step-free access from drop-off to the tasting floor and to restrooms, electrical service and amperage for chill units, potable water and drainage, restroom count against your expected attendance and duration, loading access and delivery windows, and whether amplified sound is restricted.
Ask about neighborhood and curfew rules directly. A festival that ends at a certain hour is a much easier neighbor than one that does not, and you will be the one apologizing if you get it wrong.
Weather is the outdoor question, and the answer is a written plan rather than optimism. Decide in advance what triggers a move or a cancellation, who calls it and by what deadline, and how ticket holders are notified. The most useful backup is not a different site, which is usually impossible at short notice, but a shortened session with the same venue, the same permits and the same staff, ending earlier.
3. Confirm breweries, vendors, and sponsorship commitments
Breweries are the reason the festival is worth attending, and they are also businesses protecting their taproom service. First-time organizers repeatedly run into the same question: what exactly does a brewery get for sending staff and product? You should have that answer ready.
Typical offers include a booth at a reasonable fee or no fee at all, inclusion in pre-festival marketing to your email list and social channels, a pour of something rare, placement on the printed map, an opportunity to sell merch, and a tap or staff rotation instead of a fixed booth. Breweries also care about being grouped sensibly, so a single brewery pouring four taps next to a competitor’s single tap reads badly.
Write the agreement down and send it to every brewery. Cover attendance expectation, tap or pour count, product volume, pour size, staffing responsibilities, arrival and setup window, branding and signage rules, power and refrigeration provision, recycling and stillage handling, and what happens if a brewery cancels or pulls a beer late.
That last point matters more than organizers expect. Decide now what your policy is when a limited pour sells out: first-come token redemption, a per-person limit on that beer, or a substitution swap. Announcing the rule in advance turns a complaint into a known policy. Attendees at regional festivals remember a beer running out far more than they remember a long queue.
Do the same for food vendors, including at least one substantial hot option and a clear non-alcoholic range of beer, cider, and soft drinks. Zero-proof options are not a courtesy; they are how you keep non-drinkers and designated drivers inside and staying longer. Collect a certificate of insurance naming your organization as an additional insured from every food vendor and every brewery that is not covered under your own policy. This is standard practice at well-run guild events, and it is one of the least enjoyable hours of paper you will spend.
4. Secure permits, insurance, and alcohol compliance
This step gates everything else, and in the US the paperwork starts with the state control board rather than the city. Most states offer a temporary or occasional beer and wine permit, sometimes called a temporary beer and wine permit or a TDO, that covers a defined event, a defined dates-and-hours window, a named location and a named licensee. Some states and counties also impose event permit, assembly, street closure, fire, health department or noise requirements on top of it.
Build a jurisdiction-specific checklist and mark each item with the agency, the lead time and the fee. In the US, that usually means the state alcohol control board temporary permit, local event or special event approval, temporary food permits and health department inspection for each food vendor, sales and use tax obligations, a business licence if you are not covered by an exemption, and any zoning, assembly or occupancy approval. Ask the venue in writing which of these they already hold, and ask the licensing authority in writing what you are responsible for. Do not assume the venue’s existing licence covers your event.
In the UK, the equivalent route is a Temporary Events Notice filed with the local authority, which covers a smaller audience and a limited window, or a premises licence variation for anything larger. Outside the US, the naming changes entirely, so work from the local authority rather than translating a US checklist.
Insurance is the other half. General liability covers injury and property damage; liquor liability covers claims specifically arising from alcohol service and is usually required by the venue and by participating breweries. Ask an agent who has done event work, and get limits that meet or exceed what your venue requires. Name your organization and, where required, the venue and the breweries as additional insured.
Insurance and licensing interact. In many jurisdictions, an insurer will not bind coverage without knowing the permit status, and the authority will not approve without proof of insurance. Start both in week one and expect six to twelve weeks, sometimes longer, in total.
Rules vary by state, county and city and they change, so treat everything above as the shape of the process rather than the exact requirements. Get your answers in writing, keep them with your agreements, and re-check them the year before your second edition.
5. Build the ticketing, promotion, and sales system
Choose general admission, timed entry, or sessions. General admission is simplest and works below the point where queues become the main experience. Timed entry caps headcount inside the room at any moment and is the right choice for an indoor festival near occupancy limits. Sessions multiply your ticket inventory and give you a natural changeover, but they double the staffing and cleaning peak.
Define what the ticket includes before you set a price. Beer included in the ticket, a fixed number of samples, or tokens or wristbands redeemed at the bar are three different products with different margins and different behaviours. A tasting flight add-on, a commemorative festival glass, and early entry for an early bird tier all raise perceived value without raising your core cost much.
Watch the fee stack. Payment processing, platform and per-ticket fees can move a real share of every ticket, so set the price on what you need to net, not on what feels round. Write a refund and credit policy that names the weather and cancellation cases, because the unhappy emails will be about that.
Build the box office plan before launch: how door sales work, how a sold-out session behaves at the gate, what happens to people who arrive without tickets, and who has the authority to comp. Keep a manual check-in list and a backup scanner. If your ticketing platform fails at the gate on a Saturday afternoon, the queue will absorb the damage and you will not.
Promotion is where first-year organizers stall hardest, and that is a staffing and planning problem rather than a personal failing. What works is a named date on a real event page, an email list built from the start rather than borrowed at the end, brewery co-marketing because every participating brewery promotes its own pour, local press and food writers, and ticket giveaways through partner venues.
Give yourself a marketing calendar with four anchor dates: announcement, first brewery reveals, a limited-release beer announcement roughly six weeks out, and a last call in the final two weeks. Announcing rare and limited beers is the single most reliable draw, because it gives people a reason to tell their friends that the generic beer festival does not.
6. Design the tasting flow and festival experience
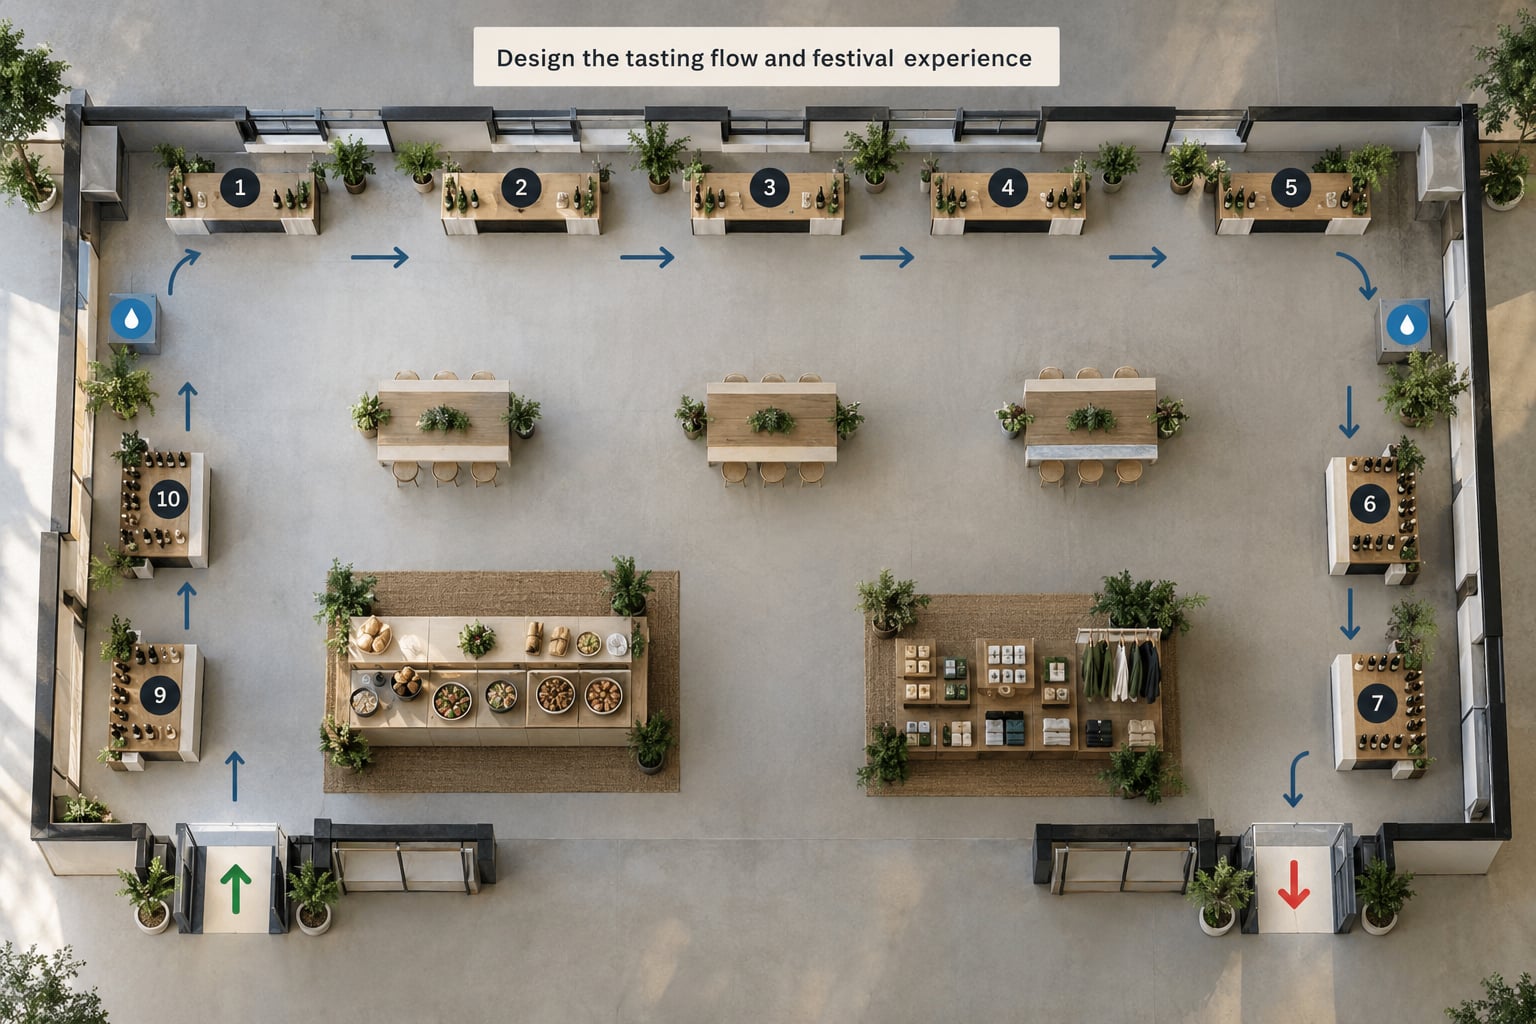
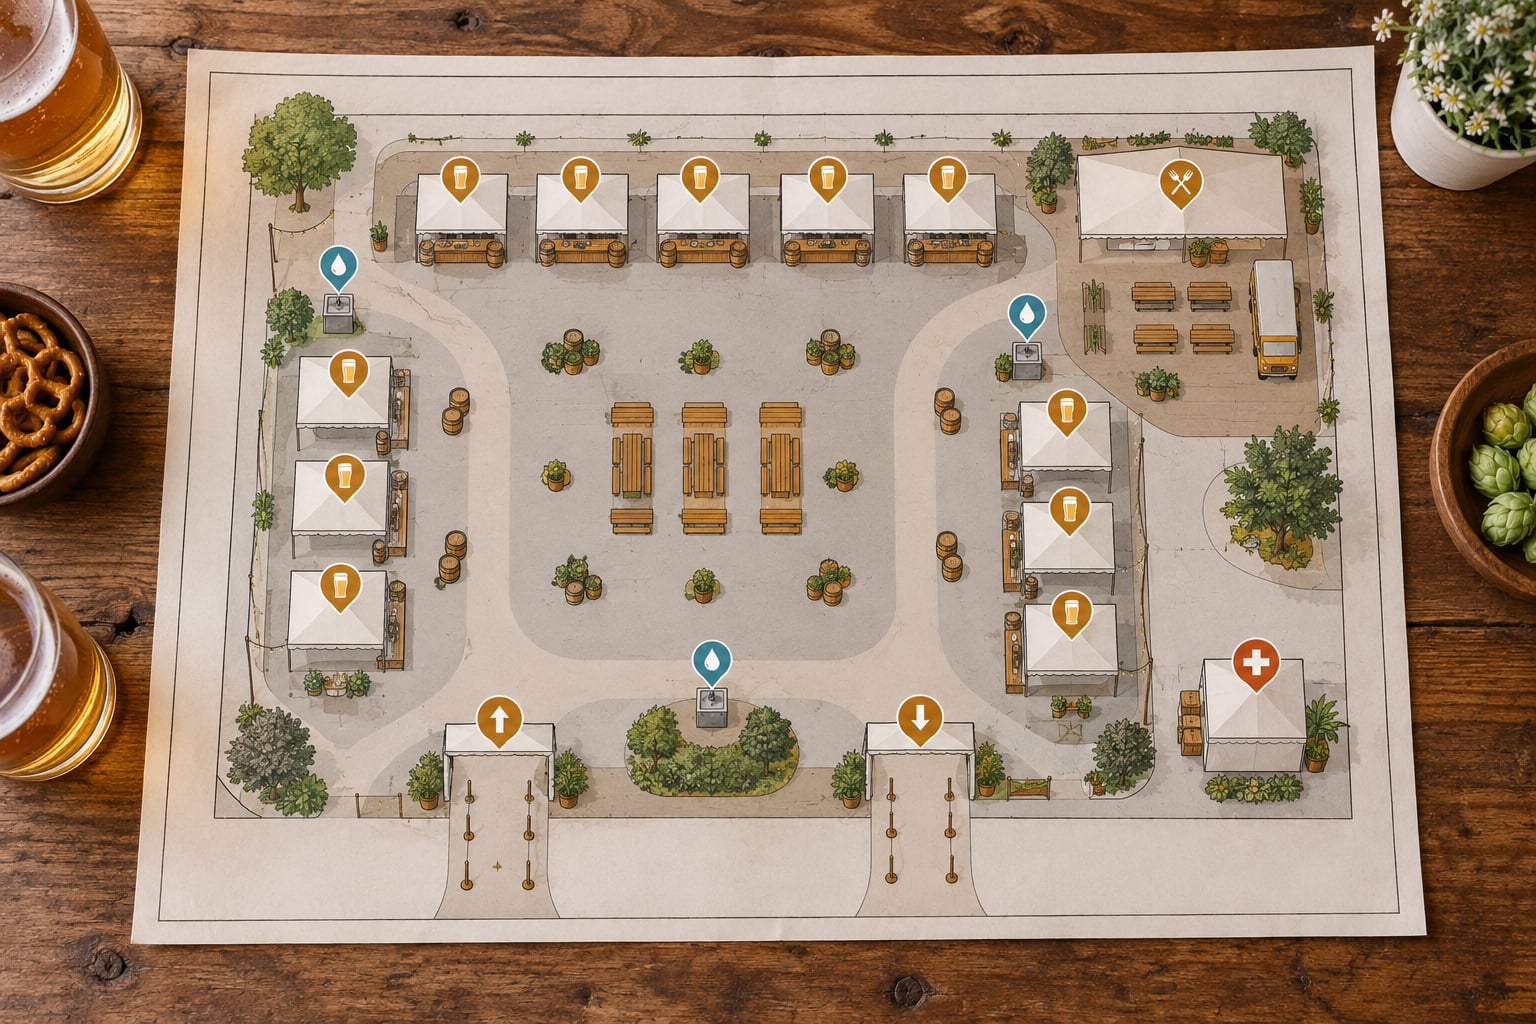
The floor plan decides whether the event feels relaxed or chaotic, and it is worth more hours than the entertainment lineup. Two rules do most of the work: spread the brewing areas so a single popular tap cannot become a bottleneck, and keep at least two independent routes so a blocked aisle does not seal the room.
Set a tasting pour size and stick to it. A small sample of roughly four ounces keeps people moving and makes the volume math work. A larger pour cuts the number of breweries a guest can reach and increases waste. Decide whether you cap each beer per guest, cap it per session, or let tokens run out, and put that rule on the printed map and on your own site.
Here is the beer volume math that most first-time organizers get wrong. A half barrel holds 15.5 gallons, which is 1,984 fluid ounces. At a 4 ounce tasting pour that is 496 samples before any loss. Allow ten percent for overage, spillage and reconciliation, which lands you at roughly 446 planned samples per keg. The practical consequence is that a single popular beer can disappear early, so a brew that you expect every guest to try needs more than one keg behind it.
| Attendance | Average samples per guest | Beer needed before overage | After 10 percent overage | Half barrels to order |
|---|---|---|---|---|
| 200 | 6 | 37.5 gallons | 41 gallons | 3 |
| 400 | 6 | 75 gallons | 83 gallons | 6 |
| 600 | 8 | 150 gallons | 165 gallons | 11 |
| 1,000 | 8 | 250 gallons | 275 gallons | 18 |
Adjust for keg size, because breweries will bring sixtels and eighths, and for unrefrigerated product if you are serving cask or ambient beer. Plan cold space for the full order plus the overage, and remember that refrigeration load is the electrical item people forget.
Water and food are not optional extras. Free water stations placed inside the tasting floor, not at the entrance, reduce pressure to drink through a queue. Food vendors should be distributed across the floor rather than clustered so people walk past them. Non-alcoholic beer and cider should be poured at the same quality and visibility as the alcoholic options.
Give people a reason to stay sober for twenty minutes. Short talks, a brewing demonstration, a quiet pour, glass recycling, a local guild table and a small set of low-volume games all work, and all of them should sit at the edges of the floor so they do not compete with tasting space.
Show beer information where people can actually read it. Style, ABV, brewery, and for limited releases a short note about why it is there. A map at the entrance plus numbering on each station gets people moving in a straight line instead of a random walk.
7. Recruit and train the event team
Assign named leads before you recruit bodies. You need leads for event operations, beer service, compliance and age verification, volunteer management, accessibility, first aid, communications, and vendor coordination. One person can hold two of these on a small event, but nobody holds all eight.
Staff to attendance, not to ambition. A useful working ratio is roughly one paid or volunteer service person per 50 to 75 guests on the tasting floor, plus a fixed core: gate staff on every session, one compliance lead, one first aider per venue floor, one person on vendor coordination, and a float for breaks. A 200-person taproom event can run on six people. A 1,000-person warehouse needs twenty on the floor before you count gate and float.
Volunteers come from brewing, homebrewing and guild communities, and the shift roster is where festivals quietly break. Publish shifts with clear start and end times, a fifteen-minute buffer for handover, a named break schedule and an explicit no-drinking-on-shift rule. Confirm each person the day before, and keep two people per shift in reserve.
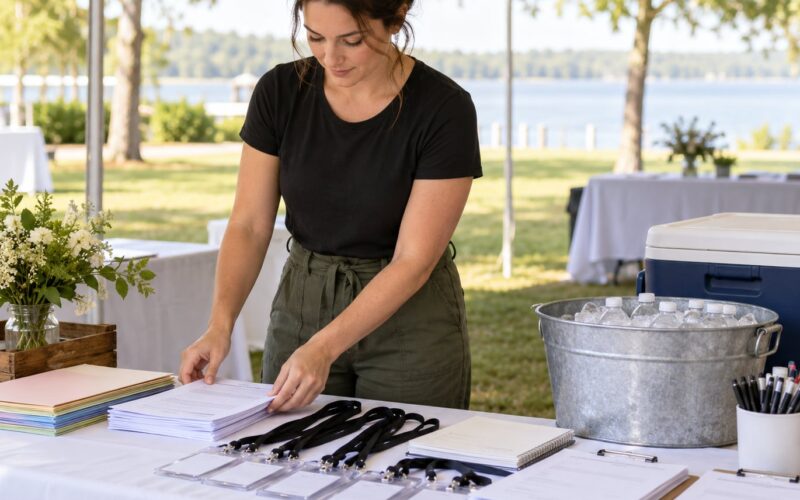
Training is short and specific: how to check identification, what to do when someone is obviously over-served, how to log an incident, where the first aid kit and the emergency contacts are, and how to use the radio channel. Everyone working service wears the same credential or lanyard style so guests know who to ask for help.
Set one escalation path and write it down. The on-shift lead handles service refusals and welfare concerns, the compliance lead handles anything involving identification or legal issues, and the event lead handles anything involving venue staff or the press. Ambiguity at the bar is how a small problem becomes an incident report.
Hold one full team briefing the morning of the event, thirty to forty-five minutes, run through the run of show, the floor plan, the radio plan and the escalation contacts, and end it with questions. Then run the communication schedule: a confirmation message the week before, a logistics message with map, transit, accessibility and permitted items the morning of, and one message with the return time.
8. Run the event and evaluate the results
Test the systems before doors open. Run every scanner, verify the check-in list works offline, confirm the token or wristband method, test the microphone if you have announcements, and walk the floor yourself looking for blocked aisles, dead spots and missing signage.
| Time | Action |
|---|---|
| 3 hours before doors | Team briefing, radio check, cellar and cold room count, first aid station set |
| 2 hours before doors | Brewery arrival, keg lineup, signage, water stations filled, entry lanes open |
| 30 minutes before doors | Compliance walk-through, ID check training refresh, final queue plan |
| Doors | Entry scanning, stagger release of sessions, floor team in position |
| Mid-session | Restroom and waste check, queue observation, keg replenishment, welfare sweep |
| Last pour | Announced final call, then stop service at the announced time |
| After close | Cash and token reconciliation, keg count returned, incident notes, vendor sign-out |
Manage the queue as a design problem. Open the gate early, use a timed release for headcount-limited sessions, keep an announcement line for delays, and never let the door close early on a late-arriving crowd without telling them why. Experienced event crews consistently name gate management as the failure point.
Monitor alcohol service continuously rather than at the end. Servers log refusals, look for guests who are showing signs of impairment, keep food and water visible, and have a simple welfare process: a quiet seat, water, a call to a designated driver or a safe ride service, and a named person to notify if a guest is unwell and alone. Publish the safe ride number on the map.
Protect cash and inventory. Use a cash float with signed reconciliation at every session change, keep the register away from exits, count kegs and tokens at close, and have one person own the money trail from the start of the event to the bank.
Close responsibly. Announce the last call thirty minutes out, stop service on time even when the queue is long, arrange safe transport messaging, and hold the team until the floor is clear and reconciliation is done.
Then evaluate. Reconcile ticket revenue against attendance and against check-in counts, because those three numbers rarely agree on the first attempt and the gap tells you where your check-in process failed. Total the beer that came back as unopened versus what was poured. Collect a short attendee survey at exit with three questions, and ask every brewery for a one-paragraph debrief on staffing, pour volume and sales.
Write the post-mortem the same week while it is fresh. Record what worked, what failed, what nearly failed, and the three things you will change before the next edition. Regional festivals that have run for well over a decade tend to credit that longevity to consistent community and guild structure rather than novelty, which is exactly what a written post-mortem builds.
Common Mistakes
These are the errors that cost organizers money or repeat a bad night. Each one has a fix you can apply long before the event.
Undersizing the budget. Most first-timers forget sanitation, staffing overtime, refrigeration, printing and the reconciliation gap. Fix it by costing the fixed items first, adding staffing to the last hour, and holding a 10 to 15 percent reserve that nobody spends on promotion.
Booking the venue too late. Good dates and suitable rooms go early, and venue availability constrains your date, not the other way round. Fix it by holding two dates and two venues until permits and budget are confirmed, then release the loser quickly.
Relying on verbal brewery commitments. A brewer saying yes on the phone is not a beer list. Fix it with a written agreement and a signed confirmation, and keep a live tracker showing confirmed, tentative and declined.
Treating permits as a formality. The permit can invalidate everything, including the insurance. Fix it by opening the licensing conversation in week one, in writing, with the state control board or local authority, and by not selling tickets before approval is in hand.
Poor queue design. Two entrance lanes, a visible ID check, timed release, and no bottles or bags into the tasting floor will fix most gate problems before they happen.
Skipping water and food placement. Water at the entrance is not water for the person on the tasting floor. Put free water inside the tasting area and spread food vendors across it.
Weak age verification. Checking at the gate and not again later, or accepting whatever a guest flashes, is where festivals get into trouble. Fix it with consistent ID checks at entry, wristband verification on re-entry, compliance-trained staff only on that duty, and a written refusal process.
No plan for a popular beer running out. Announce per-person limits on limited pours in advance, set them in the printed map, and never improvise a limit at the tap mid-session.
Leaving it to the brewery to solve marketing. Ask participating breweries for named promotional commitments, email sends, social posts and staff time in the agreement, and track them the way you track money.
A few final planning tips. Start small on your first edition and grow, because a repeat event with 300 happy guests beats a one-off with 1,200 that never comes back. Always keep one date in reserve for weather. Get everything in writing, even the friendly breweries. And build the reconciliation habits early, because the numbers tell you whether the next edition is viable.
Frequently Asked Questions
How far in advance should I plan a beer festival?
Start six to twelve months ahead for a large first-time festival, and earlier if you need breweries to reserve production. Licensing and insurance are the slow gates, and both can take six to twelve weeks on their own. Venue hold, permit approval, brewery commitments and ticketing setup should run in parallel, not in sequence. Smaller taproom events can be done in three to four months if the venue is already cooperative.
How many beer styles should a festival offer?
Offer enough variety to feel generous without overwhelming guests or servers. A workable split is local breweries first, a spread of recognizable styles so first-timers have anchors, and a small number of limited releases to justify the trip. Plan on roughly six samples per guest for a tasting-first festival, and publish the full list before the event so people can plan a route.
Do beer festivals need special insurance?
Often, yes, and it is usually required before the venue will sign. Ask the venue and your local licensing authority exactly which coverages they expect, in writing, and get the answers before you bind a policy. Most organizers carry general liability plus liquor liability, and add the venue and participating breweries as additional insured where required. Collect a certificate of insurance from every food vendor and brewery too.
How should I manage alcohol service responsibly?
Use trained servers, verify legal drinking age at entry with wristbands on re-entry, keep tasting pours controlled to a set size, and put free water and food inside the tasting area rather than at the gate. Watch for guests showing signs of impairment and give servers a clear process for pausing service. Provide safe ride information, and have a named person on shift responsible for guest welfare.
Do I need a liquor license to run a beer festival?
In most US states, yes, either a temporary or occasional beer and wine permit or a special event authorization from the state alcohol control board, sometimes called a TDO. Local event, food, health, occupancy and zoning approvals usually apply as well. Outside the US the naming and thresholds change completely, for example a Temporary Events Notice in the UK. Confirm in writing with the issuing authority before you sell any tickets.
Conclusion
To plan a beer festival as an organizer, follow one order and protect it: permits and insurance, then date and venue, then breweries and food vendors, then beer volume and budget, then ticketing and marketing, then staffing, then the run of show. Every shortcut past licensing is a risk you cannot price, and every shortcut past capacity is a risk you cannot control.
Start today with four things. Write the concept and the attendance cap. Build the costed budget with a reserve. Open the licensing conversation in writing with your state control board or local authority. Then check the capacity of your two best venue options against your break-even number. Everything else in this guide follows from those four.
Start small, put every commitment in writing, and write the post-mortem the same week. The festivals that last are the ones that get boring about the details.