If homebrew bottles are not carbonating, the problem is almost always one of four things: no viable yeast, not enough priming sugar, a room that is too cold, or not enough time on the clock. Work through them in that order and you will usually find the cause in an evening, before the batch is gone.
The order matters. Bottling is the last point where you can change a batch, so check the things you can still measure before you start opening bottles at random. Here is the short triage list, then the detail.
- The beer had not finished fermenting when you bottled it.
- The priming sugar was under-dosed, or the syrup never mixed in and settled at the bottom of the bucket.
- The bottles are sitting somewhere too cold for yeast to work.
- The yeast in the bottle is dead, old, or was already at its alcohol tolerance.
- The caps are not sealing, so pressure escapes as it forms.
- The headspace is too small, so there is no room for the carbon dioxide to work.
- You bottled on a highly flocculent strain that dropped to the bottom of the fermenter.
- You simply opened the batch before the second fermentation finished.
I have watched brewers panic and open twelve bottles looking for an answer they could have found in one. Pick one bottle, keep the rest sealed, and run the checks below.
Table of Contents
- What You Need
- What to Do If Homebrew Bottles Are Not Carbonating: Step-by-Step
- Step 1: Confirm the beer has finished fermenting first
- Step 2: Check the priming-sugar amount and timing
- Step 3: Inspect temperature and yeast condition
- Step 4: Check for leaks, loose caps, and venting problems
- Step 5: Give conditioned beer more time
- Step 6: Decide what to do if homebrew bottles are not carbonating yet
- Common Mistakes
- Frequently Asked Questions
- How long should homebrew bottles take to carbonate?
- Can I add priming sugar to beer that is already in bottles?
- Does chilling homebrew make it carbonate faster?
- Why are my homebrew bottles flat but not sour?
- Can I force-carbonate flat homebrew, and when is it safe to do so?
- Is flat homebrew safe to drink if it was properly sanitized?
- Conclusion
What You Need
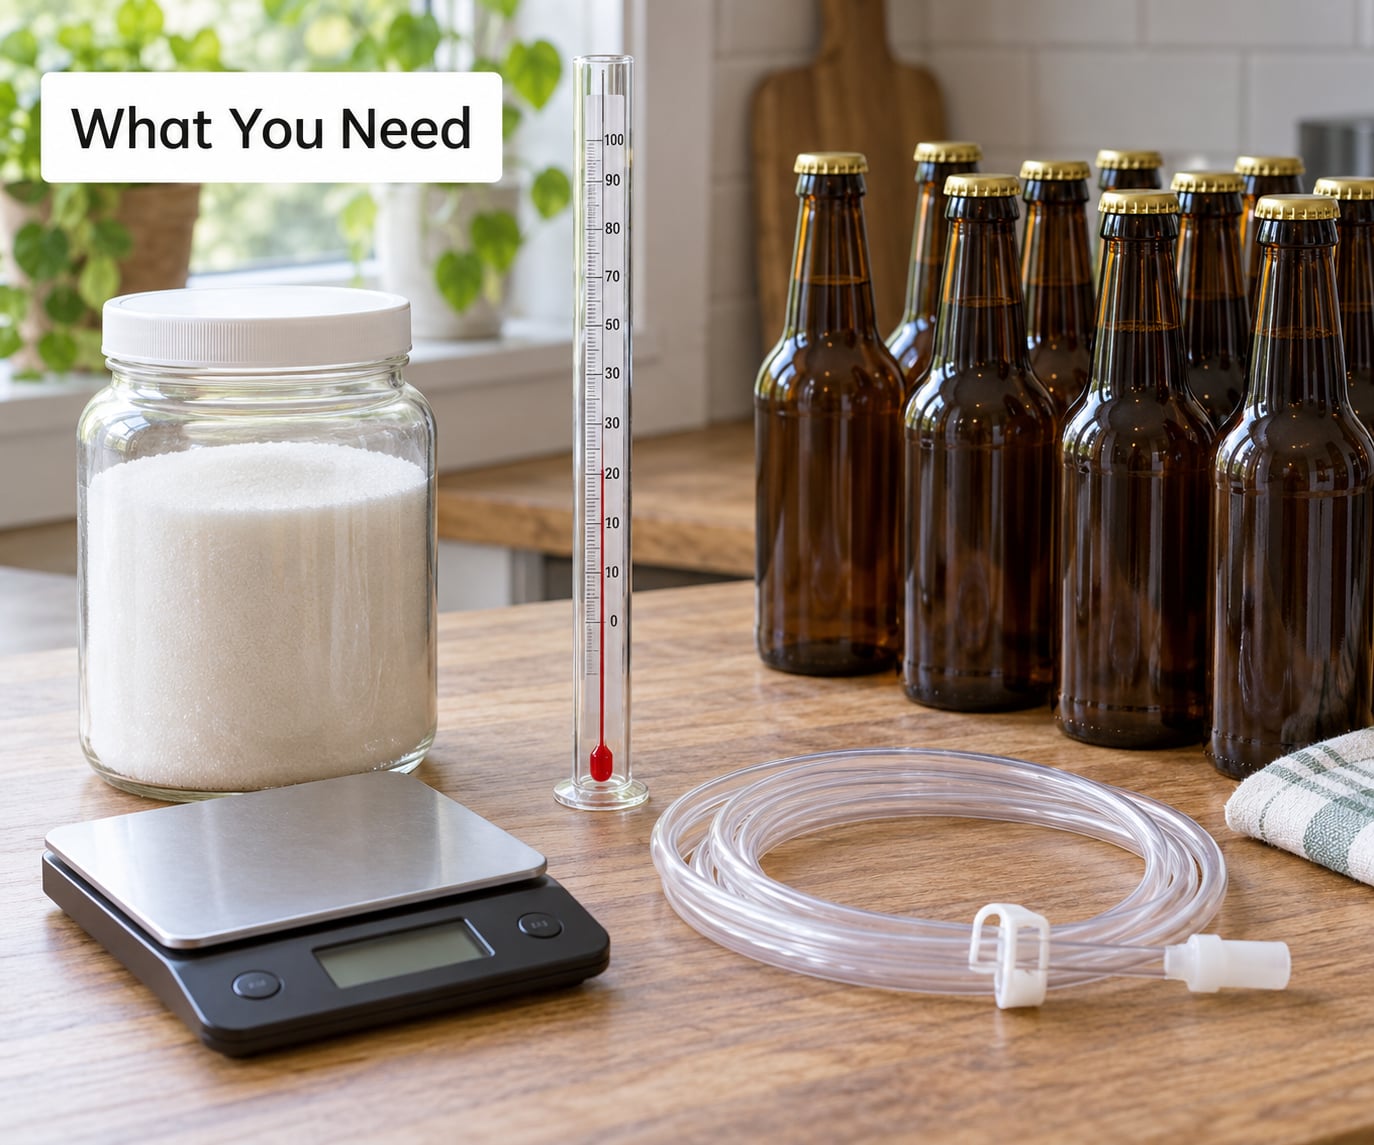
You do not need a new kit to diagnose this. A short list covers it:
- An accurate thermometer. Room temperature is the single most commonly wrong assumption in homebrewing, and a cheap fridge thermometer or a probe left in a glass of water will tell you the truth.
- A scale that reads grams. Guessing priming sugar by eye is the most common cause of flat or gushing bottles.
- Priming sugar — dextrose, table sugar or a measured syrup — for the correction dose later.
- Sanitized bottling equipment if you end up repackaging: a bucket, a wand or siphon, and clean bottles.
- A bottle opener, a clean glass, and a bottle cap. You need all three for the single-bottle test.
- Optional: tubing, an oral syringe for per-bottle dosing, and a beverage thermometer for chilling one bottle to test carbonation.
A note on glassware before you start. If your beer has carbonation but the glass has no head, you have a cleaning problem, not a brewing problem. Soak your glasses overnight in brewery wash and let them air dry completely; detergent oils kill head retention and make flat beer look like an even flatter beer.
What to Do If Homebrew Bottles Are Not Carbonating: Step-by-Step
Step 1: Confirm the beer has finished fermenting first
A flat bottle is not proof that fermentation is still running. Take a hydrometer reading on a sample from the fermenter, or on a bottle you are willing to sacrifice, and take a second reading two days later. If the number does not move, fermentation is done. If it is still falling, the batch was bottled early and any sugar you add now may not be fully fermented, which is a different problem with different rules.
Incomplete fermentation also means unpredictable carbonation and extra sweetness, because the yeast has not cleaned up the sugars it would normally eat. Let the beer finish in the fermenter before anything else.
Step 2: Check the priming-sugar amount and timing
Most flat batches are under-primed. As a rough guide, a standard 12 oz bottle wants roughly 2 to 2.5 g of dextrose for moderate carbonation, a 22 oz bomber about 4 g, and a 750 ml bottle about 5 g. Table sugar works about the same way but is slightly less fermentable, so it gives a touch more residual sweetness.
Timing matters just as much. Priming sugar added to warm, actively fermenting beer gets eaten by the yeast already at work and never reaches the bottle. Add it to beer that has finished fermenting, mixed in fully, and is already cool.
The classic mistake is a syrup poured into a cool bottling bucket. A dense sugar solution will not mix with cold beer, so it sinks straight to the bottom: your first bottles are flat, your last bottles gush. If your batch showed uneven carbonation across bottles, this is almost certainly what happened.
Step 3: Inspect temperature and yeast condition
Bottle conditioning wants a stable 68-80°F (20-27°C). Below about 60°F the yeast slows to a crawl, which is why batches conditioned in a cold cellar or an unheated garage in winter are still flat after a month. Above roughly 85°F you get poor flavor and faster oxidation.
Warm one bottle gradually to room temperature and give it time. If it develops carbonation that the cold bottles never did, temperature was the whole story.
Then consider the yeast itself. Highly flocculent strains drop out of suspension well before the end of fermentation, leaving too few cells to handle the sugar in the bottle. So does a very clean, over-attenuated batch, or a strain already sitting at its alcohol tolerance. Yeast that sat opened to air for hours before bottling is stressed and slow to start. None of these problems show up in the fermenter, because primary fermentation is already over when they bite.
Step 4: Check for leaks, loose caps, and venting problems
Check the caps. Reused crown caps that have been boiled lose their adhesive and quietly leak pressure for weeks. Swing-top gaskets harden with age and stop gripping. A cap that was never fully tightened on the capper, or the wrong cap style for the bottle, produces the same result.
Quick test: submerge a capped bottle in a sink or bucket of water and look for a steady stream of bubbles at the seam. Then open one bottle next to a sealed one and compare. If one is noticeably flatter, sealing is your culprit, and every other fix is wasted effort until it is corrected.
Headspace is the other half of this step. Leave roughly an inch of room above the beer. Too little headspace means carbon dioxide has nowhere to go, which starves yeast and pushes dissolved gas out as foam the moment you open. This is common in growlers and odd-shaped bottles, where the wand geometry does not match the bottle.
Step 5: Give conditioned beer more time
Two weeks is the optimistic number, not the guarantee. Typical timelines:
- Light ales, wheat beers, session IPAs: 1 to 2 weeks
- Standard pale ales, porters, stouts: 2 to 3 weeks
- High-ABV or cold-conditioned batches: 4 to 6 weeks, sometimes longer
If your bottles still hiss gently when you crack one, the second fermentation is happening. That sound is pressure you have not lost yet. If they are dead silent and room temperature, something stopped.
Test gently: chill one bottle for an hour or two, then open it cold. Cold beer holds carbonation better, so you get a fair read on what is actually dissolved rather than what the glass looks like when warm and foaming.
Step 6: Decide what to do if homebrew bottles are not carbonating yet
Once you know the cause, pick a path:
- Wait if the beer is cold, still bubbling, or simply young.
- Chill and re-test one bottle if you are unsure whether there is any carbonation at all.
- Add a measured dose of sugar if the beer tastes sweet and has viable yeast. Pop one bottle, add 2 to 3 g of sugar, recap it, and wait one to two weeks. If it fizzes up, the yeast was alive and the original problem was sugar or mixing. Half a teaspoon of table sugar per bottle is the shortcut version for small one- and two-gallon batches.
- Add fresh yeast with the sugar if the bottle is thin, sour-smelling, or has been sealed for a long time. A dry wine or champagne strain pitched at bottling time gives a second fermentation something to work with.
- Repackage into a keg and force-carbonate if the bottles are already sealed badly or you need the beer sooner. Chill to serving temperature, carbonate with CO2 over several days in short bursts rather than one long blast, then bottle from the keg.
Never dose the whole batch at once until one test bottle proves the yeast responds. Over-primed bottles foam out of the glass and can go bomb; do not open a bottle that is rock hard at room temperature, and do not shake bottles that are already over-carbonating.
Common Mistakes
- Estimating sugar by eye. A level teaspoon is not a measurement, and the error compounds across twenty bottles. Weigh it.
- Adding sugar while fermentation is active. The working yeast eats it first. Wait for stable final gravity and a cold batch.
- Pouring syrup into a cool bucket without mixing. Warm the sugar solution to 120-130°F, stir it into the beer gently, then stir the bucket again when it is half full and again when it is finished.
- Using non-canonical caps or loose caps. Use caps rated for the bottle, seat them properly on the capper, and stop reusing caps that have been boiled many times.
- Conditioning in a cold room for months. Beer on a cold cellar floor is often colder than the room reads.
- Opening bottles early to check. Every opened bottle is a bottle you cannot fix, and the opened oxygen helps nothing. Chill one, open one.
- Filling bottles too high. Without an inch of headspace, carbonation cannot complete.
- Chasing head retention instead of carbonation. No foam on the glass is a glassware problem. No bubbles anywhere in the bottle is a brewing problem.
On shaking bottles: a gentle swirl keeps yeast in suspension and can help, but shaking hard stirs in oxygen and dulls the aroma. Most brewers settle on a turn now and then rather than daily agitation.
If you want the wider picture on the yeast side, what yeast does in beer explains why a stressed culture underperforms. And if the beer is also tasting wrong rather than just flat, start with how to fix off flavors in homebrew.
Frequently Asked Questions
How long should homebrew bottles take to carbonate?
Most light ales need one to two weeks, standard pale ales and stouts two to three, and high-ABV or cold-conditioned batches four to six weeks. Cold rooms add weeks rather than days. If a bottle still hisses softly when opened, the second fermentation is still working. If it is silent and room temperature, troubleshoot the sugar, yeast or cap rather than waiting longer.
Can I add priming sugar to beer that is already in bottles?
Yes, and it is the standard rescue for a flat batch with living yeast. Open one test bottle, add 2 to 3 g of sugar, recap it, and wait one to two weeks. If it carbonates, the yeast was fine and the original problem was sugar or mixing. If it does not, add a dry wine or champagne strain with the sugar for a fresh population. Test one bottle before treating the batch.
Does chilling homebrew make it carbonate faster?
No. Cold beer slows yeast down, which is why a batch in a cold cellar stays flat. Chilling has one useful purpose: testing. A cold bottle holds its carbonation better, so opening one chilled gives you an honest read on what is actually dissolved. For faster carbonation, move the bottles to a stable 68-80F and leave them there.
Why are my homebrew bottles flat but not sour?
Flat with no sour or cidery taste usually points away from contamination and toward a carbonation problem: no priming sugar, cold bottles, no viable yeast, or caps that leak. A sour or thin-vinegar taste is different and suggests bacteria or an oxidised, under-attenuated batch. Taste the beer fresh from the fermenter first. If that sample is clean, the bottles, not the batch, are the problem.
Can I force-carbonate flat homebrew, and when is it safe to do so?
Yes, and it is the fastest recovery route when bottles are already sealed. Chill the beer fully first, then carbonate in a keg with short bursts rather than one long blast, giving it a few days between. Never force-carbonate warm beer, because cold liquid will not hold the gas properly. If you bottle from the keg afterward, condition those bottles briefly before serving.
Is flat homebrew safe to drink if it was properly sanitized?
Flat beer is not a safety problem. It simply has less carbonation and may taste sweeter, thinner or more yeasty than intended. If the batch was sanitized and finished fermenting cleanly, it is safe to drink at any point. The caution is the opposite of flatness: do not open a bottle that is rock hard or hissing violently at room temperature, because over-carbonated bottles can foam over or go bomb.
Conclusion
Start by confirming fermentation is finished, then let the bottles condition fully at 68-80F and test a single chilled bottle. If it is still flat and the beer tastes sweet, add 2 to 3 g of sugar to one bottle, recap it, and give it two weeks. Do not open the whole batch looking for an explanation, and log the sugar weight and conditioning temperature this time so the next batch is easier to read. If you want a fuller rundown of the causes, why is my homebrew flat goes deeper on each one. Updated for 2026.