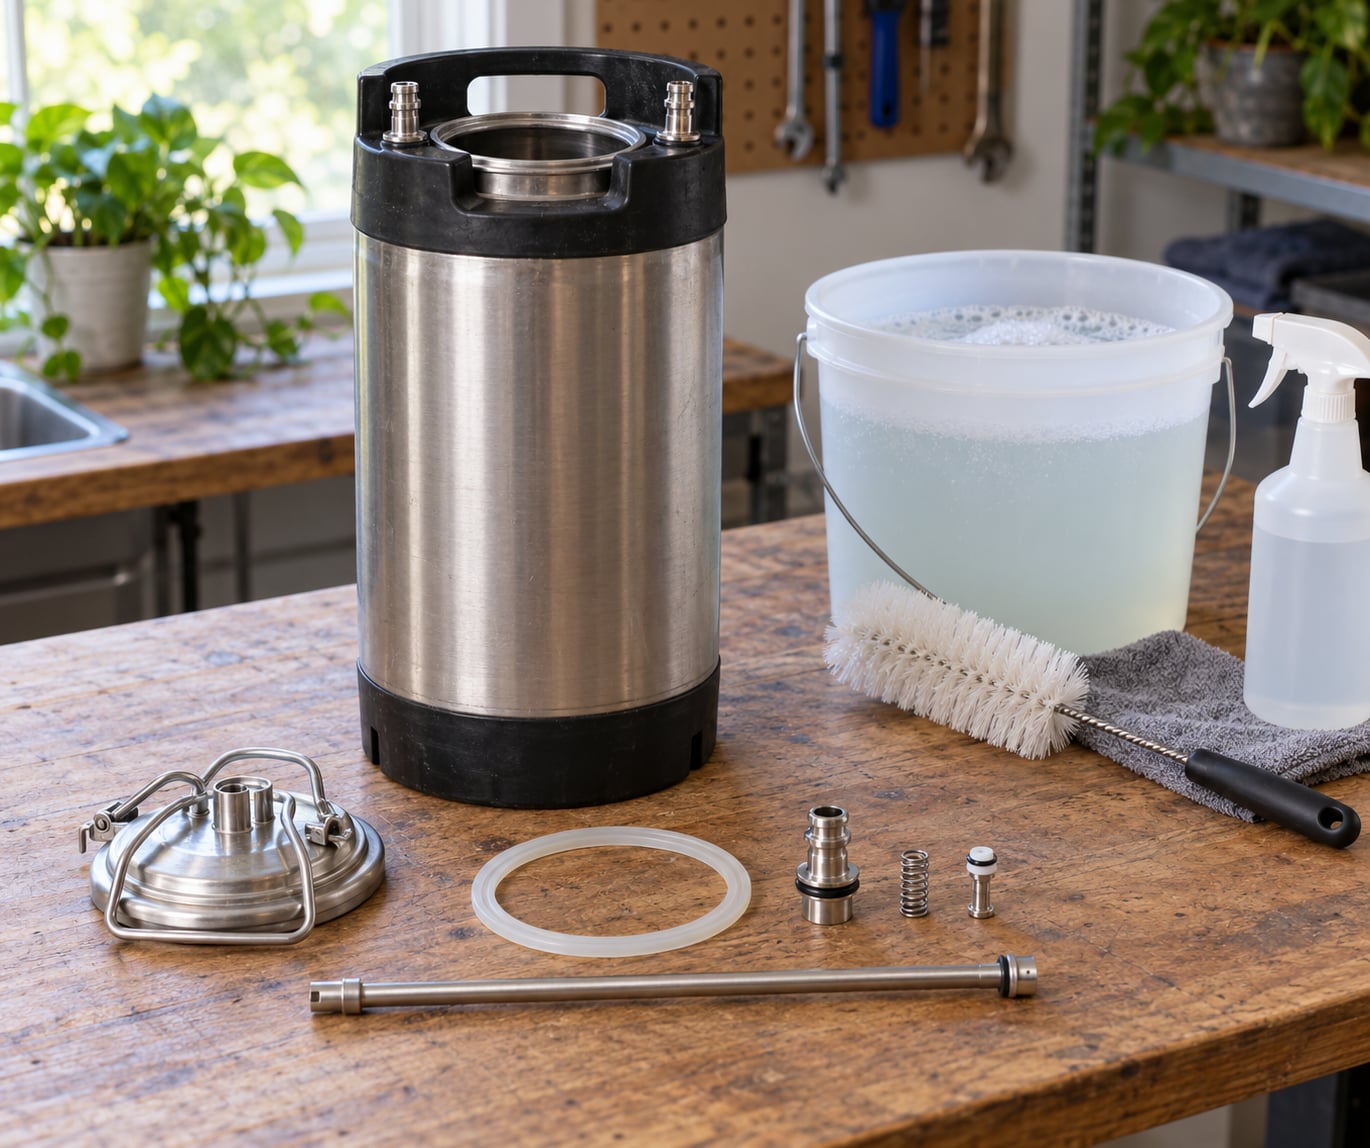
To clean a corny keg step by step, you vent the pressure, take off the couplers, posts, poppets and dip tube, soak the steel in a hot brewery cleaner, scrub, rinse until the water runs clear, then sanitize with a no-rinse solution before reassembling. The whole job takes about fifteen minutes of actual work plus soaking time, and the updated method below is what I run on every keg that touches my beer.
The reason it matters is that a corny keg is not clean just because the steel looks shiny. The places that hold beer are the dip tube, the two posts, the poppet valves and the lid gasket, and those are exactly the places where protein and hop residue turn into biofilm. Once that film takes hold you get band-aid, buttered popcorn and metallic notes that no amount of priming sugar will hide.
One note before we start, because it trips up almost everyone. Cleaning and sanitizing are two different jobs. Cleaning removes beer, protein and film. Sanitizing kills whatever microbes are left on a surface you already cleaned. A sanitizer used on a dirty keg does almost nothing, and a clean keg left to air dry without sanitizer is an open invitation. You need both, in that order.
Table of Contents
- What You Need
- Tools
- Chemicals
- How to Clean a Corny Keg Step by Step
- 1. Drain the Keg and Pour Out the Remaining Beer
- 2. Disconnect and Remove the Keg Hardware
- 3. Make a Cleaning Solution and Soak the Parts
- 4. Scrub the Keg Thoroughly, Top to Bottom
- 5. Rinse Every Part Completely
- 6. Sanitize the Keg and Accessories
- 7. Let the Keg Air-Dry and Reassemble It for the Next Fill
- How to tell the cleaning worked
- Common Mistakes That Ruin the Next Batch
- Frequently Asked Questions
- How often should I clean a corny keg?
- How do I get a bad smell out of a corny keg?
- How should I clean a keg after a bad or infected batch?
- Can I use vinegar to clean a corny keg or keg lines?
- Do I have to rinse after sanitizing a corny keg?
- When should I replace parts on a corny keg?
- The Fifteen-Minute Routine Worth Repeating
What You Need
The tool list is short, and most of it you probably own already or can borrow. The chemical list is where people waste money, so it is worth getting right.
Tools
- A 17mm combination wrench for the lid bolts and nuts on most ball lock and pin lock kegs. Some older lids use 19mm, so try 17 first.
- A deep well socket that matches your post size for ball lock kegs. Ball lock posts are 8mm hex on the common models, so an 8mm deep well socket or a pin lock style keg socket does the job.
- A 22mm combination wrench for pin lock posts, which have a larger threaded shaft than ball locks.
- A keg brush or carboy brush with a handle long enough to reach the bottom and a smaller one for the dip tube.
- A flathead screwdriver for prying seat and gasket parts, plus a small pickup tool for the hose pin if your couplers use one.
- Two 5 gallon buckets, one for cleaning solution and one for sanitizer, and a floor drain or a place you can dump several gallons of liquid safely.
What is optional: a rubber mallet, which matters more than you would think when a post has been torqued down in place for years. A small submersible pump turns a five gallon soak into a ten minute recirculating wash, and if you own more than two kegs it pays for itself quickly. A ball lock disconnector and the matching wrench are the same tool, so do not buy both.
Chemicals
Here is the honest comparison, including what to keep away from your keg.
| Product | What it does | Safe on stainless | Rinse required | Notes |
|---|---|---|---|---|
| PBW (powdered brewery wash) | Cleaning. Oxygen activated, dissolves protein, hop and sugar residue | Yes | Yes, thoroughly | The one most brewers buy. Solution goes flat after roughly 20 to 30 minutes, so mix it fresh |
| OxyClean Free | Cleaning. Peroxide based, loosens dried residue | Yes | Yes | Good alternative when PBW is hard to track down. Slightly gentler on protein films |
| Star San | Sanitizing only. Fast acting no-rinse iodine based | Yes | No | Mixes at any concentration. Stains surfaces, which is cosmetic only |
| SaniClean | Cleaning and sanitizing in one step | Yes | No | Better for odor heavy or unknown history kegs because it also loosens residue |
| Bleach | Sanitizing | No | Yes, twice | Do not use. It attacks and pits stainless and leaves chlorine taste in the keg |
| Dish soap | Grease cutting | Yes but a problem | Effectively no | Avoid it. Nearly impossible to rinse fully and it leaves bitter, astringent notes |
| Vinegar | Weak acid degreaser | Yes | Yes | Not enough on its own. It is a flavor neutral rinse aid, not a cleaner or sanitizer |
PBW is sold as a concentrate powder, so the dilution matters more than the brand. Here are the numbers people argue about in every forum thread, settled in one place.
| Cleaner | Amount per gallon | Water temperature | Soak time | Notes |
|---|---|---|---|---|
| PBW | 1 ounce, about 2 tablespoons | 160°F for dissolving, then let cool | 30 to 60 minutes | Shake the keg at the 30 minute mark to move fresh solution to the film |
| OxyClean Free | 1 to 2 tablespoons | Warm to hot water | 30 minutes minimum | Works best on dried, older residue than on fresh beer |
| Star San sanitizer | 2 ml per gallon | Cold or warm, either works | 1 minute of contact time | Apply after the final rinse, never before |
Here is the cadence. Most people do the first row every time and treat the other two as optional, which is how a keg slowly turns into a science project.
| Task | How often | Time |
|---|---|---|
| Rinse, scrub, and sanitize between fills | Every fill | 10 to 15 minutes |
| Full soak with fresh PBW and post removal | Every 3 to 5 fills, or any time a smell shows up | 45 minutes plus soak |
| Complete disassembly, gasket inspection, line flush | Once a year | About an hour |
If you have a keg with no history, one that held soda, kombucha or cider, or one you bought with no idea what ran through it, skip straight to the full soak. Unknown history is its own reason to disassemble.
How to Clean a Corny Keg Step by Step
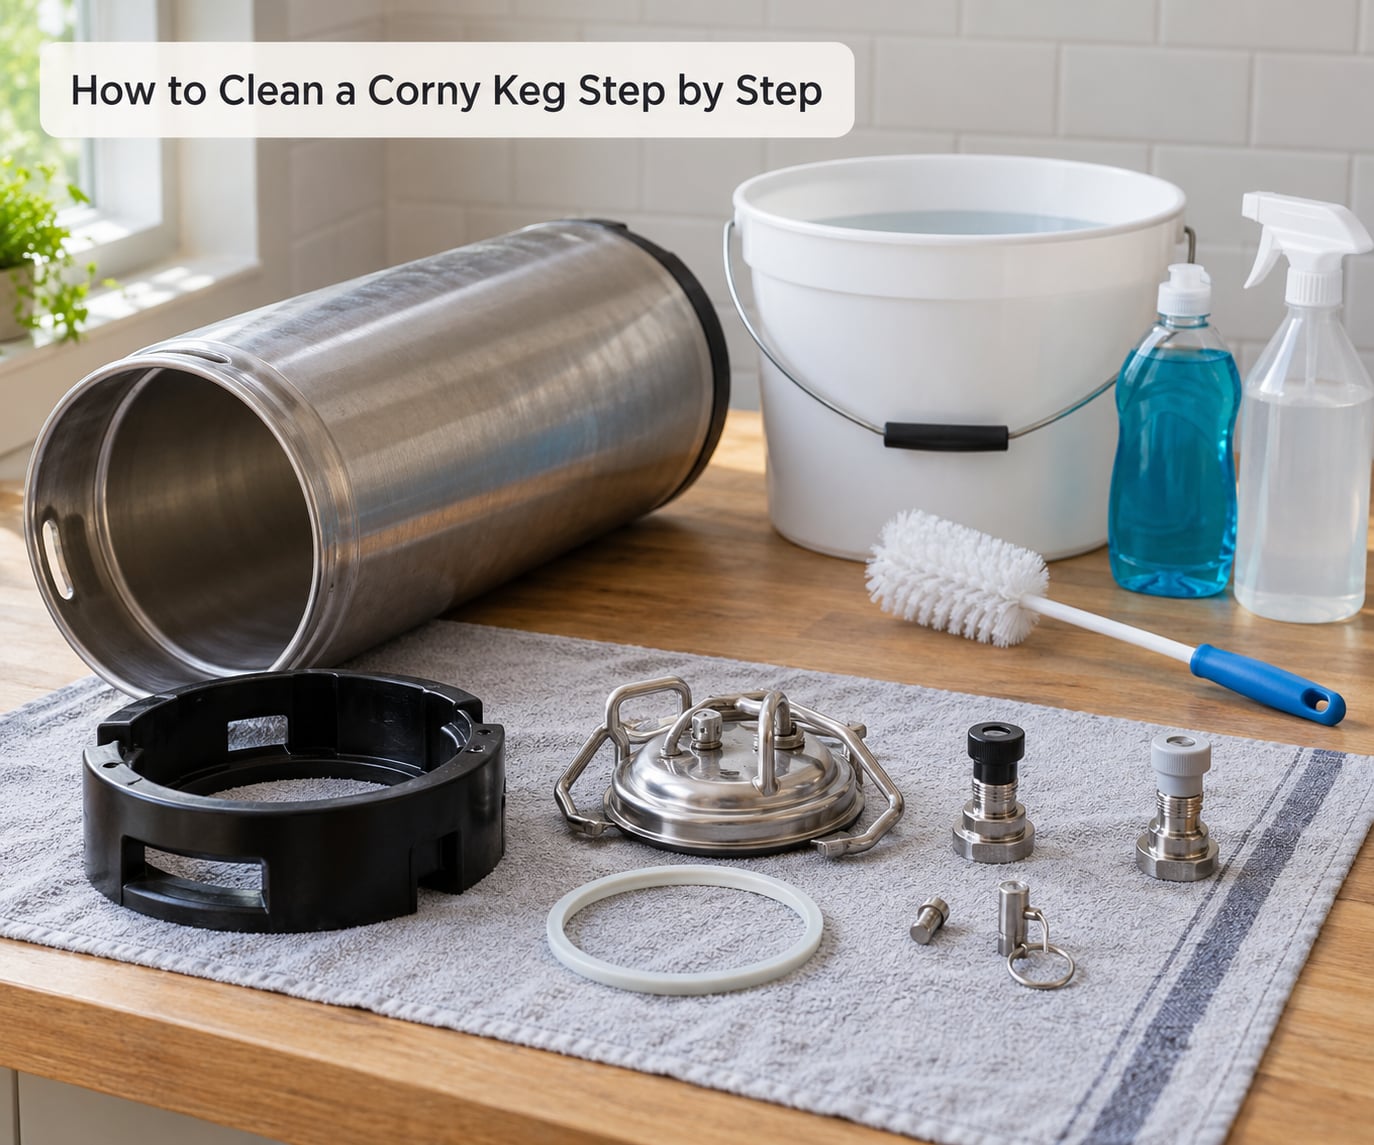
These are the seven steps in the order that actually works. Do not jump to step six because the steel looks clean. The steps take the order they take for a reason.
1. Drain the Keg and Pour Out the Remaining Beer
Pull the liquid side coupler and let the beer run out into a bucket or floor drain. Most of it comes out fast; the last gallon or so runs slow, and you can coax it by connecting the CO2 line at a few PSI with the liquid post open, which pushes the beer up through the dip tube rather than leaving it sitting in the bottom curve.
You know it is empty when the stream turns to an occasional drip and the keg weighs almost nothing. Set the gas disconnect aside and keep the liquid side open while you work.
2. Disconnect and Remove the Keg Hardware
Start by taking the pressure off properly. Push in the pressure relief valve on top of the keg until you hear the hiss and see foam at the vent, then let it finish releasing. Never crack the lid with a pressurized keg, and never use channel lock pliers on the posts. Pliers round the hex and the next person to touch that keg will have the same problem you are about to have.
Unscrew the lid bolts with the combination wrench, starting opposite each other so the gasket releases evenly. Lift the lid straight up and set it gasket side down on a towel. Fish the lid gasket out with a screwdriver if it is seated in a groove.
Now the posts. Ball lock posts come out with the matching deep well socket or a pin lock style keg socket, screwed out counterclockwise once the seats are off. Pin lock posts need the 22mm wrench and the same care. If a post resists, stop, tap the socket gently with a rubber mallet, and try again. Forcing it is how posts snap.
Take the poppet valves apart while you are there. Note which gasket came from which side and keep the two liquid side parts separate from the gas side. Pull the dip tube, unscrew it from the liquid post, and run a small brush through the whole length. That tube is where most people skip work and where most smells begin.
Line couplers, disconnects and barb fittings go into a second bucket. Hose clips and faucet screens come off too. Once everything is out, run hot tap water through the keg for a couple of minutes to loosen whatever is loose.
3. Make a Cleaning Solution and Soak the Parts
Fill a bucket with hot water and PBW at one ounce per gallon, or roughly two tablespoons. Add the loose parts first so they soak while you handle the keg, submerge them fully, and let everything sit for thirty to sixty minutes.
Two things matter here. Water above about 170°F and PBW do not get along, so use water hot enough to feel uncomfortable and no hotter. And the peroxide action that makes PBW effective decays after roughly twenty to thirty minutes, which is why brewers describe old solution as feeling flat. Mix it fresh, and shake or rotate the keg partway through the soak so the active solution touches the film.
If you have a spare hose and a submersible or dishwasher pump, you can recirculate the solution through the dip tube and the posts instead of soaking. It takes about ten minutes and it gets cleaner inside the dip tube than a brush ever will.
The other community technique worth knowing: put a few gallons of hot cleaner in the keg, put the lid on loosely, and invert the keg for ten minutes at a time. Gravity carries the solution into the dip tube interior and the underside of the lid, both of which a brush cannot reach. Turn it upright, roll it, then repeat.
4. Scrub the Keg Thoroughly, Top to Bottom
Empty the soak solution into the drain, refill with hot water and detergent if you have a food safe one, and scrub. Work from the lid down the walls, into every corner and seam where the two halves of the vessel meet, and around the threaded post wells. Stainless shows a visible swirl pattern when the brush has done its work, and that pattern is the only reliable sign of a scrubbed surface.
Handle the gaskets, o-rings and poppet seats gently. Abrasive powders and metal scouring pads scratch stainless, and those scratches are exactly the texture biofilm attaches to later. A nylon brush and a little elbow grease beats a scouring pad every time.
5. Rinse Every Part Completely
This is the step people rush, and it is why their next batch tastes bitter. Rinse the keg until the water runs completely clear with no foam, then rinse the dip tube, posts, poppets, lid and gasket separately and hold each one up to the light to check for trapped foam.
If you used detergent or dish soap, rinse two or three times. If you want a neutral check, rub a finger along the inside wall. Any slipperiness means there is still residue in there and you rinse again. Sanitizer applied over detergent is far less effective, so this step is not optional.
6. Sanitize the Keg and Accessories
Mix Star San at two milliliters per gallon in a clean bucket, or use SaniClean if the keg carries an odor you cannot shake. Submerge every part that will touch beer: dip tube, both posts, both poppet assemblies, lid and gasket. One minute of contact time is all Star San needs, so this is a soak, not an overnight project.
Pour the sanitizer into the keg, roll it so the solution coats the walls, and let it sit. Do not rinse sanitized parts. That is the whole point of a no-rinse sanitizer, and rinsing it away puts you back to square one. A no-rinse sanitizer is safe because it dries to a film that continues killing microbes, not because it is harmless to drink straight from the bucket, so store the treated keg where nothing can splash in it.
7. Let the Keg Air-Dry and Reassemble It for the Next Fill
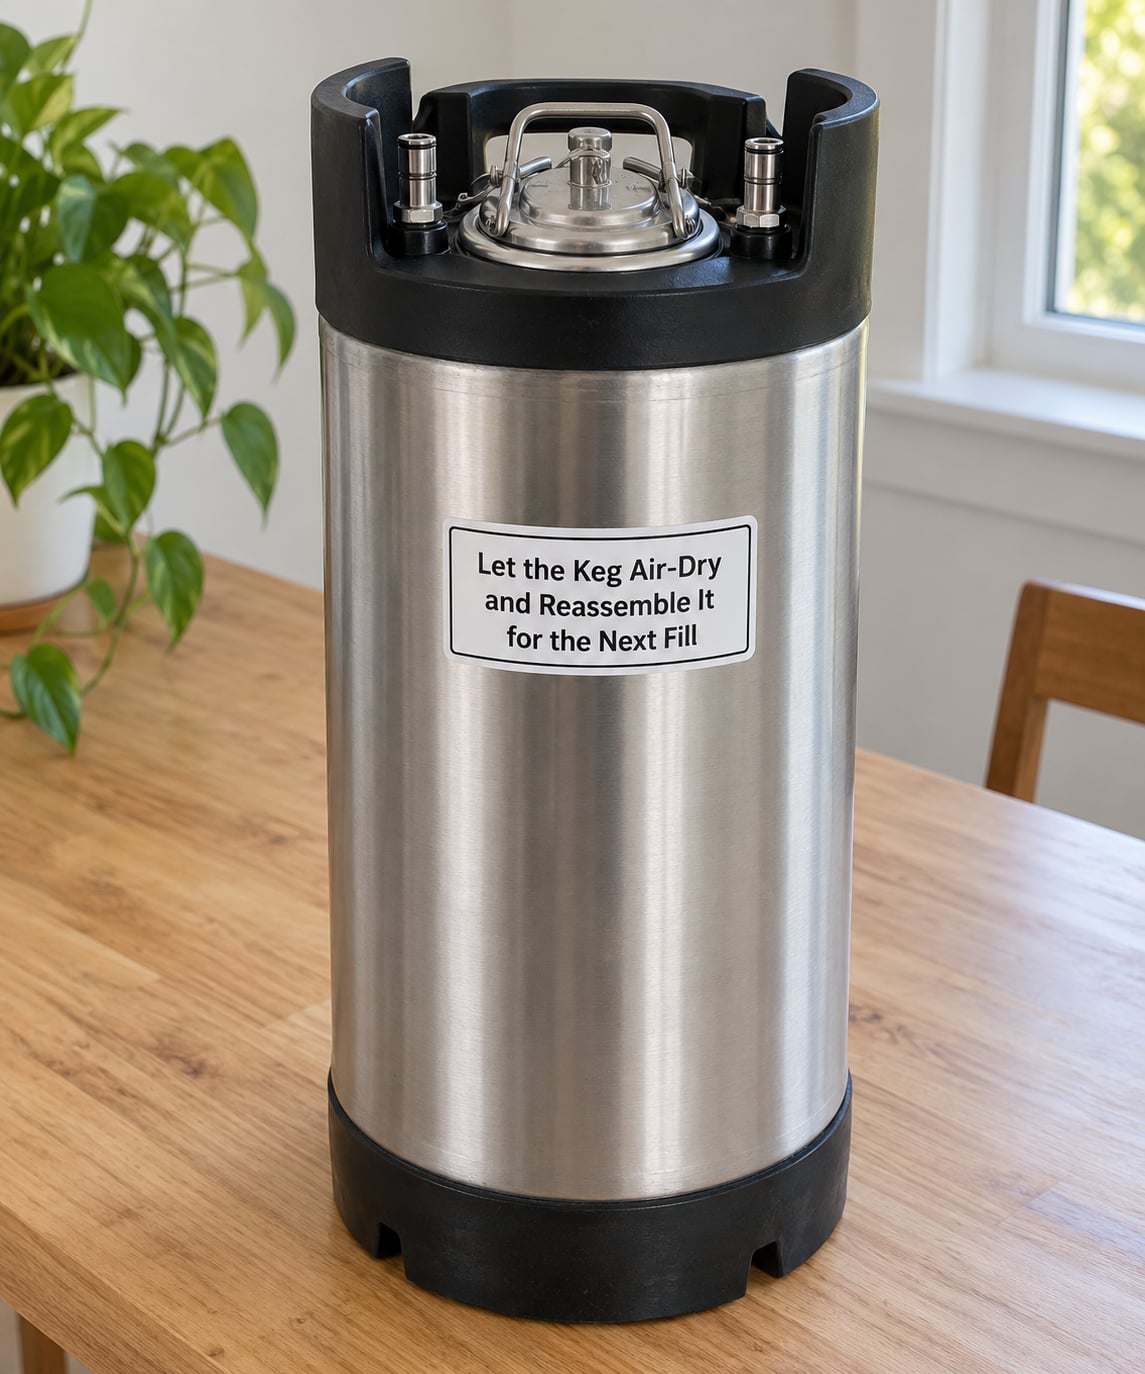
Let everything air-dry completely rather than reassembling damp. Trapped moisture in a post well or under a gasket is a small pool that breeds bacteria, and it is the single most common reason a carefully sanitized keg still contaminates a batch.
While the parts dry, look at the gaskets. Pinch them flat and check for cracks, flattening, swelling or a smell that is not going away. Rubber holds odors far more stubbornly than steel does, so a keg that still smells after a full PBW soak usually needs a new gasket and o-rings rather than a stronger cleaner. Replacements cost very little and end the guessing.
Rebuild with clean hands: dip tube threaded into the liquid post, poppets and seats seated, gasket into the lid groove, lid on, bolts tightened in a star pattern rather than one at a time. Reconnect the gas and liquid lines. If you are not filling within a week or two, pressurize the sealed keg with a few PSI of CO2 and store it somewhere cool. The pressure does not preserve beer, but any drop tells you there is a leak before the day you need the keg.
How to tell the cleaning worked
You have done it right when the inside of the steel shows an even brushed swirl with no dark patches, the dip tube runs clear water end to end, the gasket smells like nothing at all, and the assembled keg holds a little CO2 for a day without going soft. If the water in your rinse bucket smells like sour beer after the soak, that is normal. If the assembled keg smells sour later, you have a biofilm problem and the culprit is usually a part you did not take apart.
Common Mistakes That Ruin the Next Batch
Using bleach on stainless. It sanitizes, and it will also pit and oxidize the interior over time. If bleach has already been used in a keg you care about, rinse it thoroughly several times and never again.
Using dish soap. It cuts grease, which is not the problem here, and it is close to impossible to rinse out of a keg completely. The film that leaves behind is bitter and astringent, and it kills head retention on top of everything else. Food safe detergent in small amounts is a different thing and rinses normally.
Grinding the posts off with channel lock pliers. The hex rounds, and then that post leaks and will not seat. Use the socket or the wrench made for the post type.
Skipping the dip tube. The interior of the dip tube is nearly invisible and nearly always dirty. Run a brush or hose through it, or use the inversion trick, and blow it out with a burst of CO2.
Ignoring the gaskets. Every smell that survives a proper soak lives in rubber. Keep spares, check them twice a year, and replace anything hard, cracked or smelly.
Rinsing the sanitizer away. Star San and SaniClean are no-rinse by design. Let the parts air dry with the film intact.
Reassembling while damp. A wet post well is a standing pool of bacteria. Air dry, and check the threads before you tighten anything.
Waiting weeks to clean. Dried beer on the bottom of a keg turns to sediment and beer stone, and no amount of scrubbing gets it back off. Clean the keg within a day or two of emptying it. If a keg has already sat dry for months, expect a much longer soak and a serious scrub.
While you are in there, clean the beer lines too, since that is where off flavors usually start even when the keg is spotless. If a batch already tastes wrong, our guide to fixing off flavors in homebrew walks through diagnosing what you are tasting. And if you are trying to pin down whether the beer or the glass is the problem, how to taste beer step by step covers it.
Frequently Asked Questions
How often should I clean a corny keg?
Clean it before every fill, not once a month. After emptying a keg, a quick hot water rinse, scrub and sanitize takes ten to fifteen minutes and prevents residue from drying into place. Do a full soak with fresh PBW and take the posts apart every three to five fills, or any time you notice a smell. Give the whole thing a complete teardown with gasket inspection and a line flush once a year.
How do I get a bad smell out of a corny keg?
Work outward. Scrub and soak the steel with hot PBW, take apart the posts, poppets, dip tube and couplers, then sanitize everything. If the smell survives all of that, it is almost always in the rubber. Pull the lid gasket, post o-rings and poppet seats and replace any that feel hard, cracked, flattened or sour smelling. Cheap parts end more persistent odors than stronger chemicals do.
How should I clean a keg after a bad or infected batch?
Treat it like a used keg with unknown history and skip the quick clean. Disassemble it fully, soak every metal part in hot PBW for a full hour, scrub the interior, then run a recirculating wash through the dip tube and posts if you have a pump. Invert the keg with cleaner inside for ten minutes to reach the underside of the lid. Sanitize, air dry, and consider replacing the gasket and o-rings outright.
Can I use vinegar to clean a corny keg or keg lines?
Vinegar is a weak acid and a decent flavor neutral rinse aid, but it is not a cleaner and it is not a sanitizer. On its own it will not dissolve protein film or beer stone, and it does nothing about microbes. Use PBW for cleaning and Star San or SaniClean for sanitizing, and keep vinegar for the final rinse of a line if you want the neutral smell.
Do I have to rinse after sanitizing a corny keg?
No, and doing it can undo the whole process. No-rinse sanitizers such as Star San and SaniClean work by leaving a film that keeps killing microbes as they dry, so rinsing takes that protection away. Rinse thoroughly after cleaning, then apply the sanitizer and let everything air dry untouched. Just store the sanitized keg covered so nothing splashes in from the work area.
When should I replace parts on a corny keg?
Replace the lid gasket and post o-rings whenever they feel hard, cracked, flattened or permanently sour, which for most homebrewers is every one to two years of regular use. Check them twice a year while the keg is apart. Replace a dip tube that is cracked, blocked or permanently cloudy after cleaning, and a post that no longer seats tightly. A keg that will not hold a little CO2 usually has a gasket problem, not a steel problem.
The Fifteen-Minute Routine Worth Repeating
Start tonight, not on fill day. Empty the keg, vent it, pull the lid, and drop the loose parts in hot PBW. Once you have done it in that order a few times it stops being a chore and becomes the same fifteen minutes you spend on the brew day you actually enjoy.
And while the parts dry, get a spare gasket and a set of o-rings in the drawer. It is the cheapest fix in homebrewing and the one that solves the problem nobody else can. Once the glassware is clean too, our guide to cleaning beer glasses for a clear pour keeps the last step of the process from ruining a good pour.