The short answer: build a dry base, keep ice in its own container or on the floor of the cooler, and never let bread, chips, paper towels, or fruit sit directly on loose cubes. Learning how to pack a cooler so nothing gets soggy takes about ten minutes of setup and saves you a sandwich that turns to mush by hour three.
The soggy problem is rarely about the amount of ice you brought. It is about where the water ends up. Meltwater pools at the lowest point, condensation forms on any cold surface, and every time the lid opens, warm air carries moisture in and settles on whatever is on top.
What follows is the packing order I use for beer crawls, picnics, and three-day road trips, plus what to fix when things go wrong.
Table of Contents
- What You Need
- Step-by-Step
- How to Prepare the Cooler and Food
- How to Create a Dry Base
- How to Separate Food, Drinks, and Ice
- How to Fill Empty Space and Close the Cooler
- How to Keep Food Cold Safely
- Common Mistakes
- Tips for Bar Crawls, Picnics, and Road Trips
- Tips for Picnics and Day Trips
- Frequently Asked Questions
- What is the best way to keep food from getting soggy in a cooler?
- Should I use loose ice or sealed ice packs in a cooler?
- How should I pack drinks so cans and bottles do not leak?
- Where should raw meat and prepared foods go in a cooler?
- How long can food stay cold in a cooler during a day trip?
- Can I use a towel or plastic liner to keep a cooler dry?
- Conclusion
What You Need
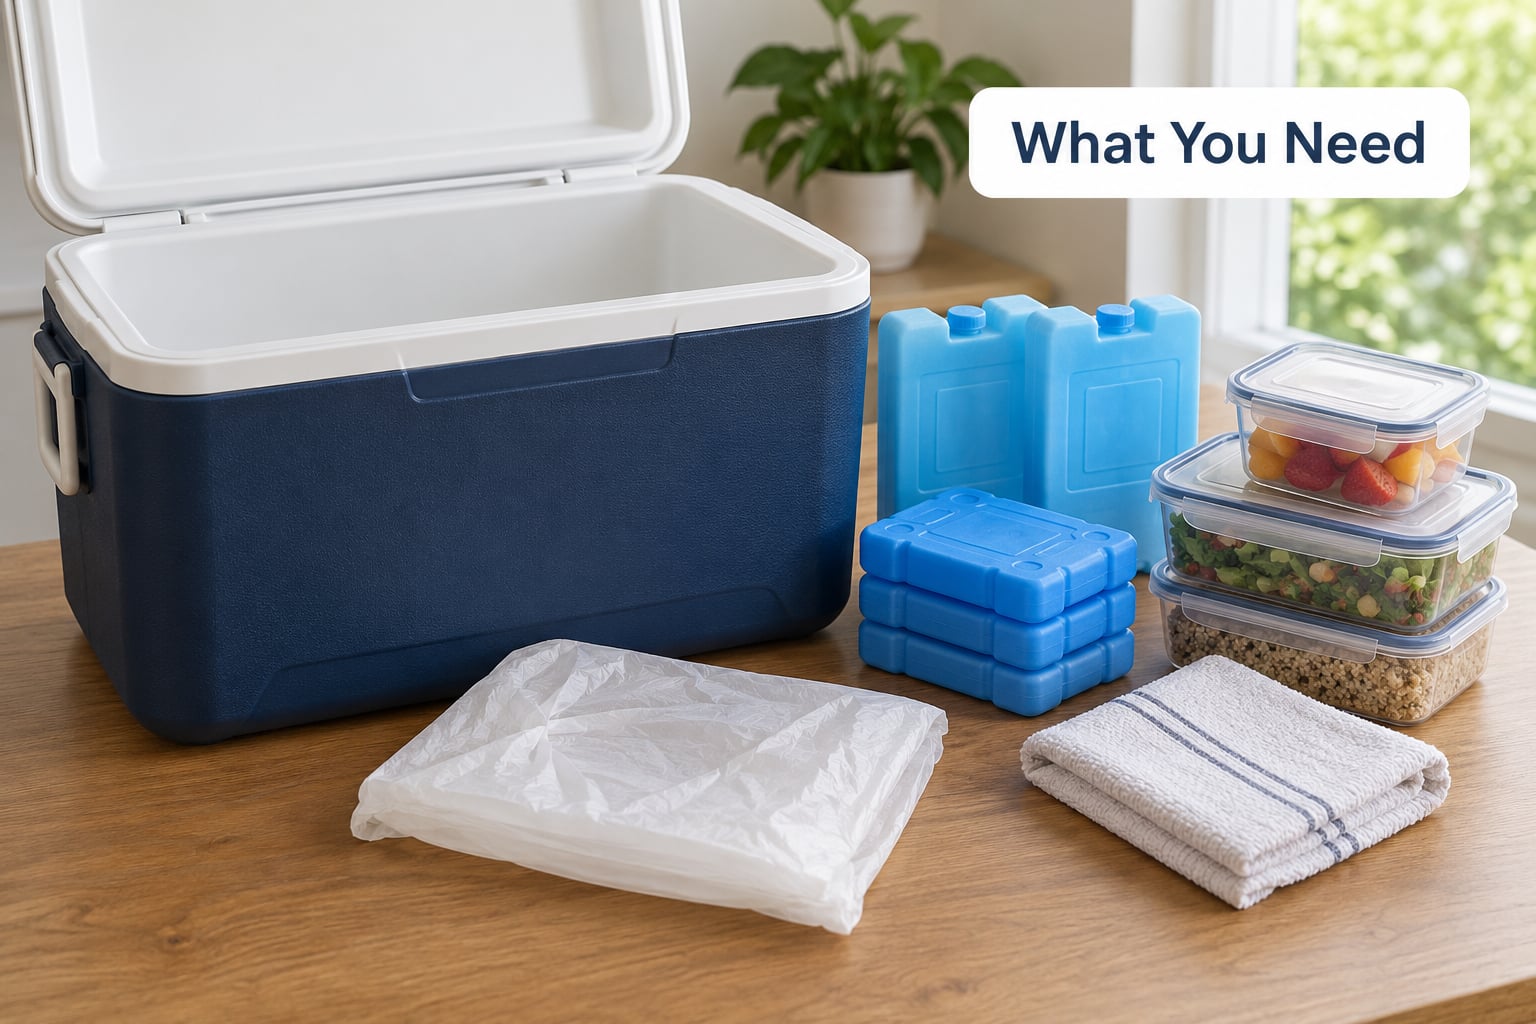
You need less than most people buy, and the order you gather it in matters almost as much as the packing itself.
- A cooler with a working latch. A lid that does not close is the single biggest reason a cooler goes warm and wet. If the gasket is missing or the plastic snaps have lost tension, bring a cam strap or a bungee.
- A towel or small bath mat to line the floor. This is your dry base, and it costs nothing.
- Leakproof containers with locking lids for anything wet or fragile: berries, cut fruit, soups, raw meat, dairy, condiments.
- Zip-top bags for dry goods, sandwiches, and paper items. Double-bag anything with a crumb or a sauce.
- Ice in a form you choose: a block, frozen water bottles, reusable packs, or a sealed zip bag of cubes.
- A small lidded bin or mini cooler that fits inside the big one. This is your dry bin for napkins, paper towels, kindling, and electronics.
- A plastic liner or tarp if the cooler interior has cracks or seams you do not trust.
- A separate bag of food-handling basics: hand sanitizer, a fork, a can opener, and a trash bag. Sealing and discarding is what keeps the meltwater clean.
Step-by-Step
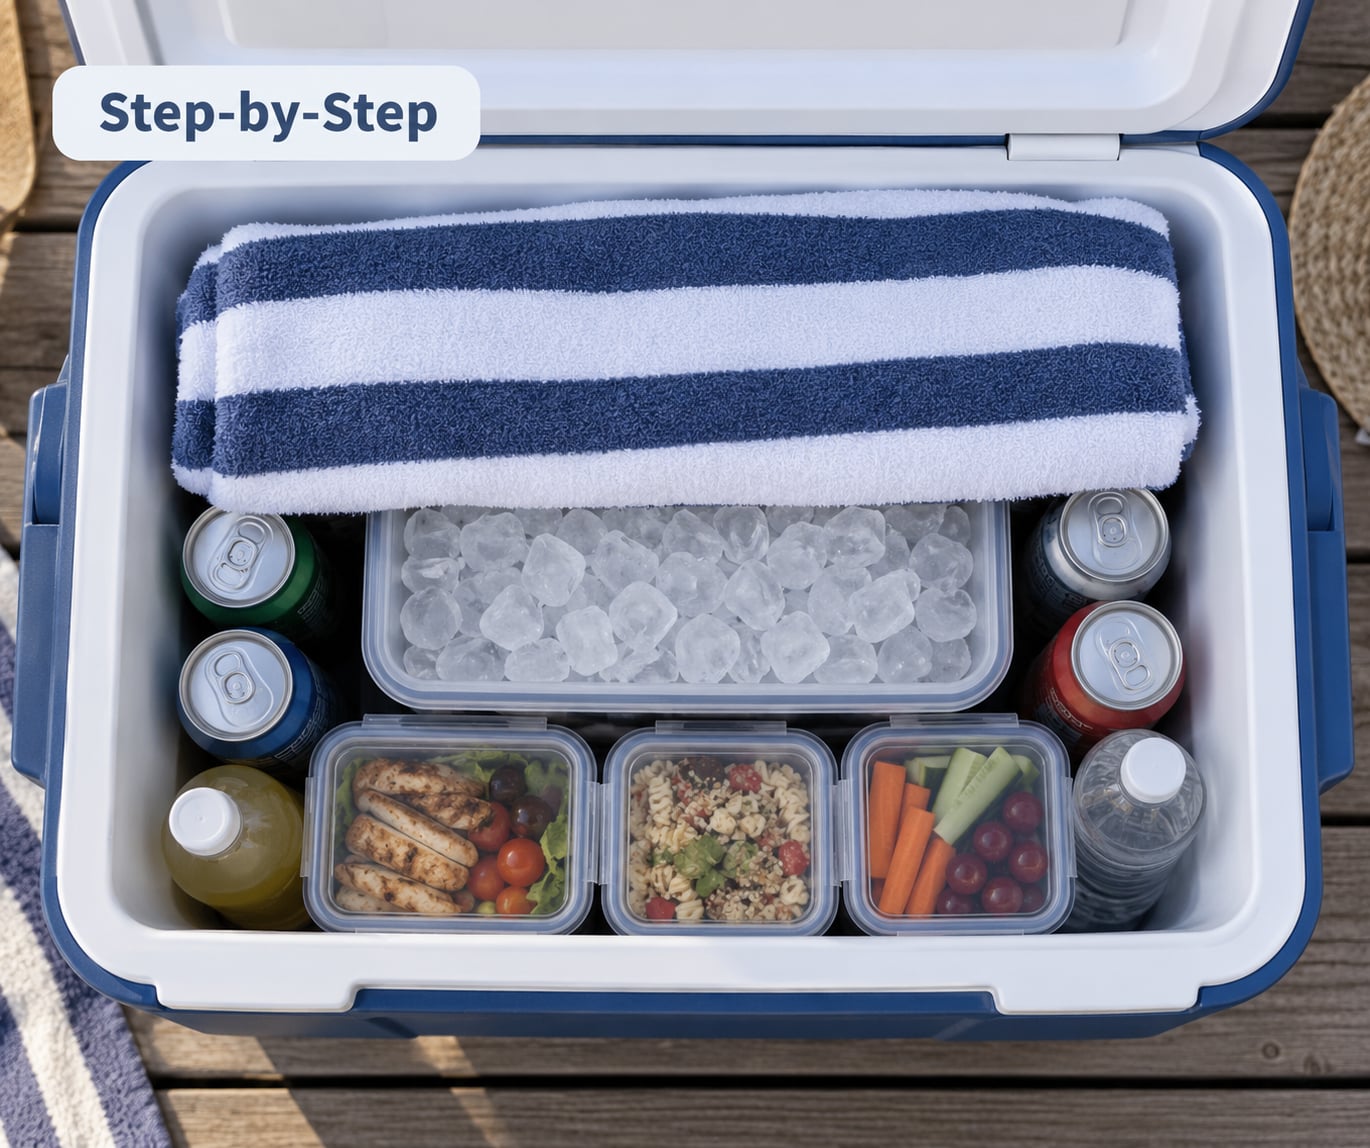
Work in layers, from the floor up. If you pack a cooler by tossing things in and shoving the lid down, the order you end up with is random, and random order is how food ends up sitting in water.
How to Prepare the Cooler and Food
Chill the cooler before you fill it. A room-temperature cooler can take a surprising number of hours just to cool down, and that time comes out of your ice budget. Leave it in a garage or shaded room overnight, or run it in the car with the air conditioning on for twenty minutes before you load it. Loading with food that is already cold gives you hours more.
Next, deal with the water already in your food. Drain canned goods and pickles, pour off brine, and blot any liquid in the container. Wash and completely dry any produce that came washed from the store. Surface moisture in a sealed container does not stay put; it migrates into bread and paper goods as the temperature drops.
Choose containers with snap or screw lids rather than lids that merely rest on top. If it cannot survive being turned on its side in a car, it will not survive a cooler.
How to Create a Dry Base
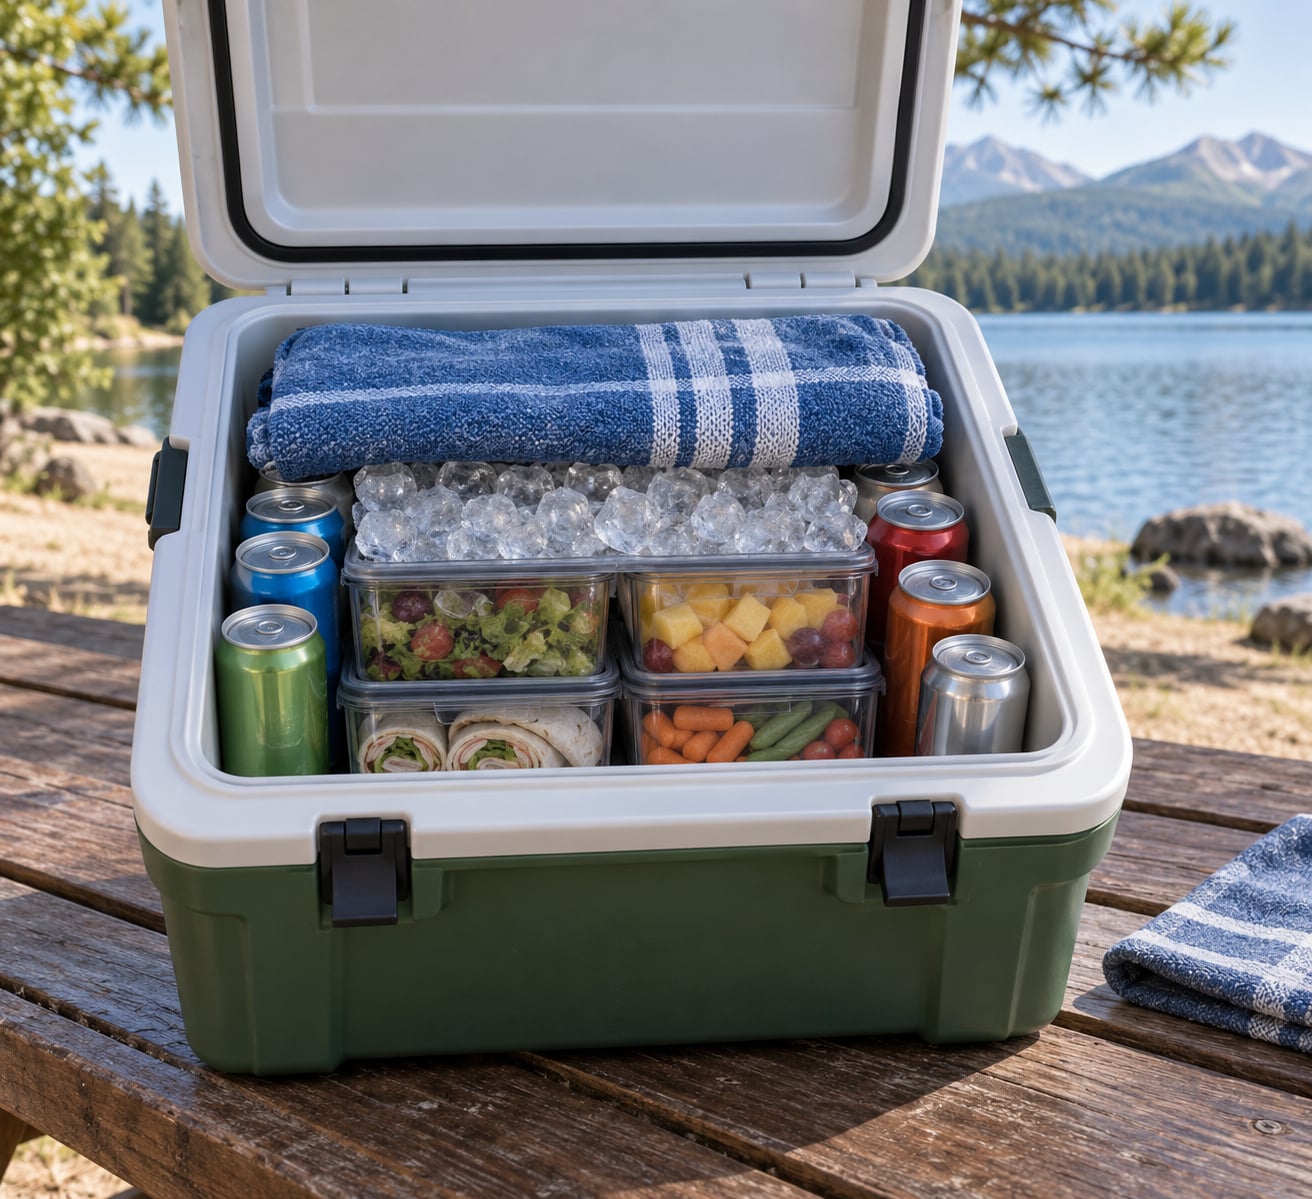
Lay a towel or folded mat across the floor of the cooler before anything else goes in. Its only job is to catch condensation and the small leaks that always happen, and to give you something to grab and wring out rather than pouring puddle water over your food.
If you want a harder surface, a shallow baking tray or a plastic tub lid works just as well, and you can lift it out and dump the water in one move. For a trip where you will be moving the cooler often, the removable tray beats a towel every time.
How to Separate Food, Drinks, and Ice
Now build the stack. Dense, frozen, and sealed items go on the bottom in direct contact with the cold mass. Drinks stand upright around the edges, where they stay cold without taking up the middle. Delicate and dry items go last, on top, where meltwater cannot reach them.
This is the part that decides whether anything gets soggy. Bread, sandwiches, chips, crackers, and paper towels must never touch loose cubes. If you are using cubed ice, put the cubes in a zip-top bag or a lidded bin first. If you are using a block, the flat top of the block is your dry shelf for the entire trip.
Raw meat goes in its own sealed container, double-bagged if possible, at the very bottom. A leak from raw poultry into shared meltwater contaminates everything sitting in that water, and people describe that as the worst cooler failure there is. Ready-to-eat food, cooked items, and drinks never go underneath raw meat.
Keep cans and bottles upright, and leave enough room at the top that a crate of beer does not crack the lid shut against the food underneath. A soft zip-top cooler is terrible at this; a hard-sided cooler that you fill to the brim will crush a sandwich under two pounds of canned drinks.
How to Fill Empty Space and Close the Cooler
Empty space is wasted cold. Air pockets sit at room-ish temperature, and each one is a place where warm air collects and cools, stealing from your ice. Fill every gap with a rolled towel, a soft jacket, a foam pad, or more ice.
Fill from the bottom outward, keep the heaviest items low, and do not stack anything fragile under the drink load. When the last item goes in and the lid closes, stop opening it. Every lift swaps warm cabin or picnic air for cold air, and that exchange is faster than most people expect.
Plan your access order before you leave. Put the things you grab most often in a basket or bin at the top so one quick reach does not mean excavating the whole cooler.
How to Keep Food Cold Safely
Keep the cooler at or below 40°F (4°C). That is the number that matters, because the 40°F to 140°F range is where bacteria multiply quickly, and a cooler sitting in direct sun can cross it in a couple of hours.
USDA guidance: poultry to 165°F (74°C), ground meat to 160°F (71°C), and whole cuts of beef, pork, lamb, and fish to 145°F (63°C). Cooked food should come out of the cooler at or below 40°F, and leftovers that sat in the danger zone for more than two hours should be tossed.
The two-hour rule applies to perishable food in a cooler. Above 90°F outside, that window shrinks to one hour. If you are driving across the country in July, assume your cooler is fighting for you, and check the temperature rather than guessing.
Common Mistakes
Loose cubed ice is the number one cause of a soggy cooler. It melts into a shallow bath, it finds every gap, and it eventually gets into bread and paper. Fix: bag the ice, bin the ice, or use a block.
Unsealed containers are the second cause. A container with a resting lid tips the moment the cooler moves, and sauce finds bread. Fix: double-bag anything wet, and keep condiments in squeeze bottles or a lidded bin rather than loose jars.
Overpacking crushes delicate food. Berries, lettuce, tomatoes, and soft bread cannot take a case of cans on top of them. Fix: put the drinks in a second cooler, or build a false floor of towels and soft goods under the top layer.
Wet produce is a quiet cause. Pre-washed salad, grapes, and melon carry surface water that shows up later as condensation on everything above them. Fix: dry them thoroughly and give them their own container.
Opening the cooler all day is the third cause of warm food, even if the water is fine. Every opening brings in air that warms and humidifies the contents. Fix: a drinks-only second cooler, plus a rule that the food cooler opens at meals and not between them.
Sun on a dark lid melts ice fast. A wet towel draped over a shaded cooler helps a little through evaporative cooling, but real shade beats any towel. Fix: a canopy, a vehicle, or a tree, and rotate the cooler so the lid faces away from the sun.
Tips for Bar Crawls, Picnics, and Road Trips
For a bar crawl or a festival, run two coolers if you can. The drink cooler gets opened twenty times and the food cooler stays shut. Keep cans upright in the drink cooler, and put your first opener in the lid pocket so you are not digging through ice with wet hands.
Pack sandwiches last, in a zip-top bag, laid flat rather than on their side so nothing presses on the crust. Chips and crackers belong in a rigid container with a towel underneath, not loose on the ice.
For road trips, freeze your water and your meat ahead of time. Frozen food counts as part of your cold mass, and a solid block of ice with a frozen dinner on top of it buys you hours that loose cubes never will. Meltwater stays in on day one, and the drain plug only comes out if food is sitting in it or the cooler gets moved a lot.
Tips for Picnics and Day Trips
For a picnic, scale the system down and keep the whole thing in one bag with the cooler, a towel, and utensils on top. Pack the towel even if it looks like overkill, because a damp ground cloth ruins a picnic faster than a warm sandwich does. Keep a separate zip bag for trash so nothing wet ends up loose in the cooler.
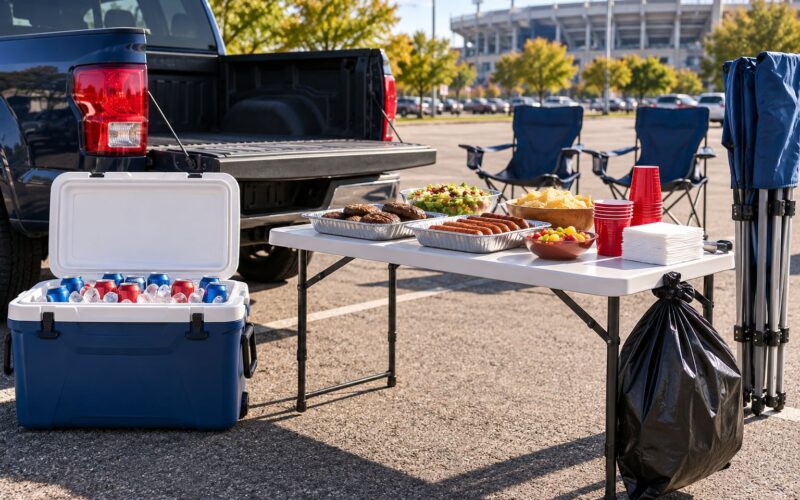
One last thing: check the cooler before you leave. Lift the lid, confirm the ice is at the bottom and the dry items are on top, and confirm the latches actually catch. Ten seconds at the tailgate saves a soggy afternoon.
Frequently Asked Questions
What is the best way to keep food from getting soggy in a cooler?
Line the floor with a towel, keep ice at the bottom or in a sealed bin, and put bread, chips, paper goods, and fruit in sealed containers on top where meltwater cannot reach them. The rule is simple: nothing dry ever touches loose ice, and nothing wet sits below anything dry.
Should I use loose ice or sealed ice packs in a cooler?
Neither loose cubes nor gel packs belong where your food sits. Loose cubes melt into a bath that soaks bread and paper. Gel packs are reusable and tidy but do not provide the cold mass of ice. A block of ice, frozen water bottles, or bagged cubes in a sealed container will keep contents dry.
How should I pack drinks so cans and bottles do not leak?
Stand cans and bottles upright around the edges of a separate drinks cooler, and leave an inch of headspace so nothing pushes against the lid. Keep the food cooler closed entirely, since every drink you pull from the food cooler warms and wets the food. Use a can opener stored in the lid so you are not fishing through ice.
Where should raw meat and prepared foods go in a cooler?
Raw meat goes in a sealed container, double-bagged if you can, at the very bottom of the cooler so any leak stays contained. Cooked food, ready-to-eat items, and drinks go above that line. A single leak of raw poultry juices into shared meltwater contaminates everything sitting in that water.
How long can food stay cold in a cooler during a day trip?
A well-packed hard-sided cooler kept in the shade stays at or below 40°F (4°C) for most of a day trip. Hot weather, a soft cooler, or frequent opening shortens that. Perishable food should not sit above 40°F for more than two hours, or one hour when the outside temperature is above 90°F.
Can I use a towel or plastic liner to keep a cooler dry?
Yes, and it is the cheapest fix there is. A towel or mat across the floor absorbs condensation and small leaks, and a shallow tray or plastic liner can be lifted out and emptied in one move. For a moving cooler, a removable tray works better because you do not have to wring anything out.
Conclusion
Start with the dry base. Lay a towel or liner across the floor of the cooler before anything else goes in, and from there the order is fixed: ice and sealed, heavy items low, drinks upright around the edges, dry and fragile items on top, every gap filled.
That one habit, plus keeping the food cooler closed between meals, is the whole difference between a dry cooler and a cooler full of floating sandwiches. Then check the latches before you pull out of the driveway.