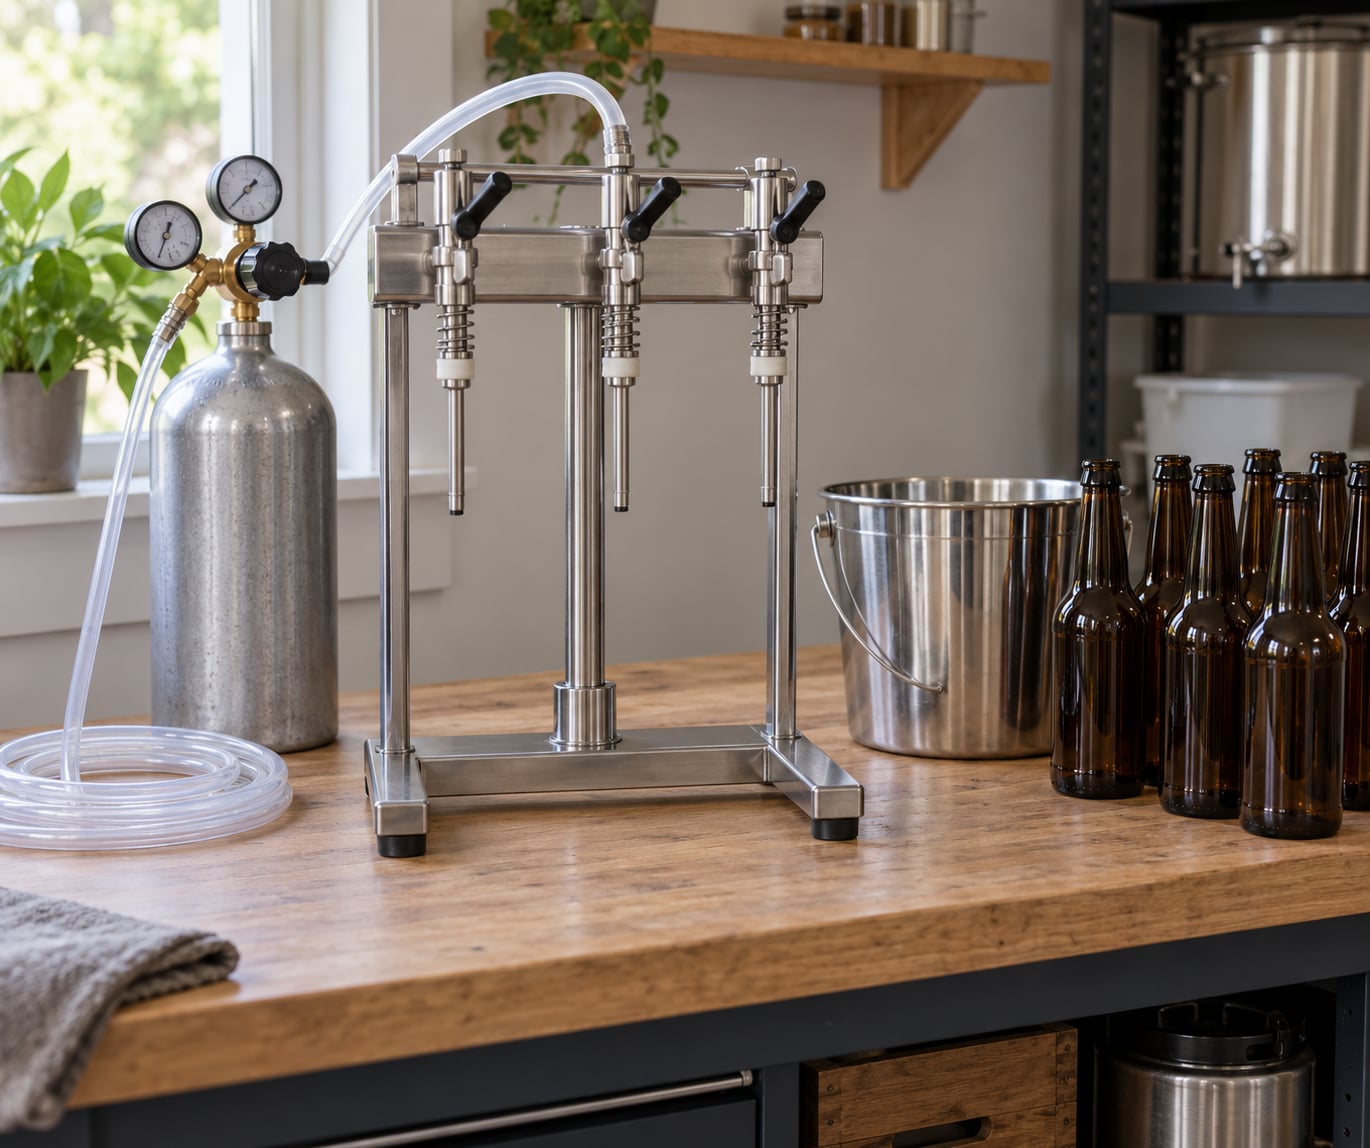
A counter pressure bottle filler moves beer that is already carbonated from a keg into glass bottles while holding onto its carbonation. You push CO2 into the bottle to clear out the air, run beer in through a tube that reaches the bottom, then cap the bottle the moment the filler comes off. A full run of a dozen bottles takes maybe 15 minutes once you have the rhythm.
The whole method rests on one idea: beer only flows while the pressure inside the bottle stays lower than the pressure in the keg. That is why you purge first, why you crack the bleeder valve just a sliver, and why the filler stays seated instead of being pushed down. Get that one rule straight and the rest of the process follows.
It is worth doing if you force carbonate in a keg and want a handful of clean bottles for a club meeting, a competition entry, a gift, or shipping. It is not worth doing for a full batch of homebrew, where a siphon and priming sugar cost less and take less time.
Table of Contents
- What You Need
- Step-by-Step: How to Use a Counter Pressure Bottle Filler
- How to Use a Counter Pressure Bottle Filler Safely
- How to Prime the Filler and Avoid Beer Waste
- How to Fill Bottles and Control Carbonation
- How to Finish, Cap, and Store the Bottles
- Common Mistakes
- Frequently Asked Questions
- What pressure should I use with a counter pressure bottle filler?
- Can I use a counter pressure bottle filler with a keg?
- How cold should the beer be when using a counter pressure bottle filler?
- Why does my beer foam heavily while filling bottles?
- How long should beer carbonate after counter pressure filling?
- Do I need to purge the receiving bottle before capping it?
- Conclusion
What You Need
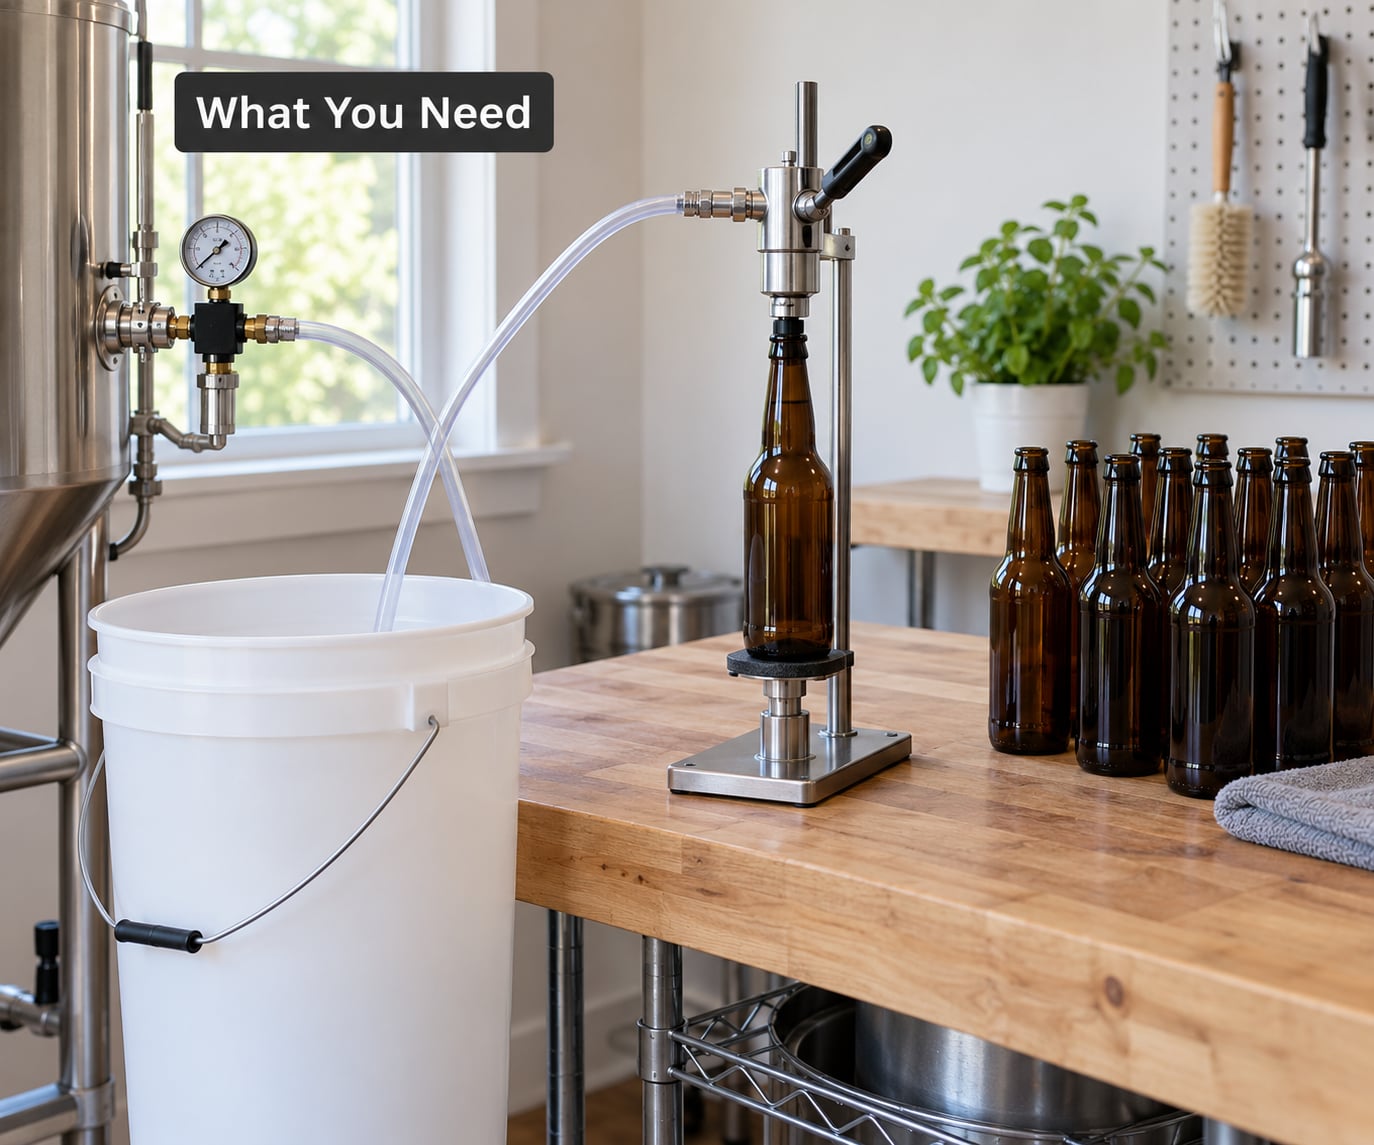
Here is the full kit list. Most of it you likely own already, and nothing on it is exotic.
- The filler itself, with its three-way ball valve, bleeder valve, and bottom-feed stem.
- A conditioned keg of finished beer, sitting cold for at least a week so the yeast has dropped out.
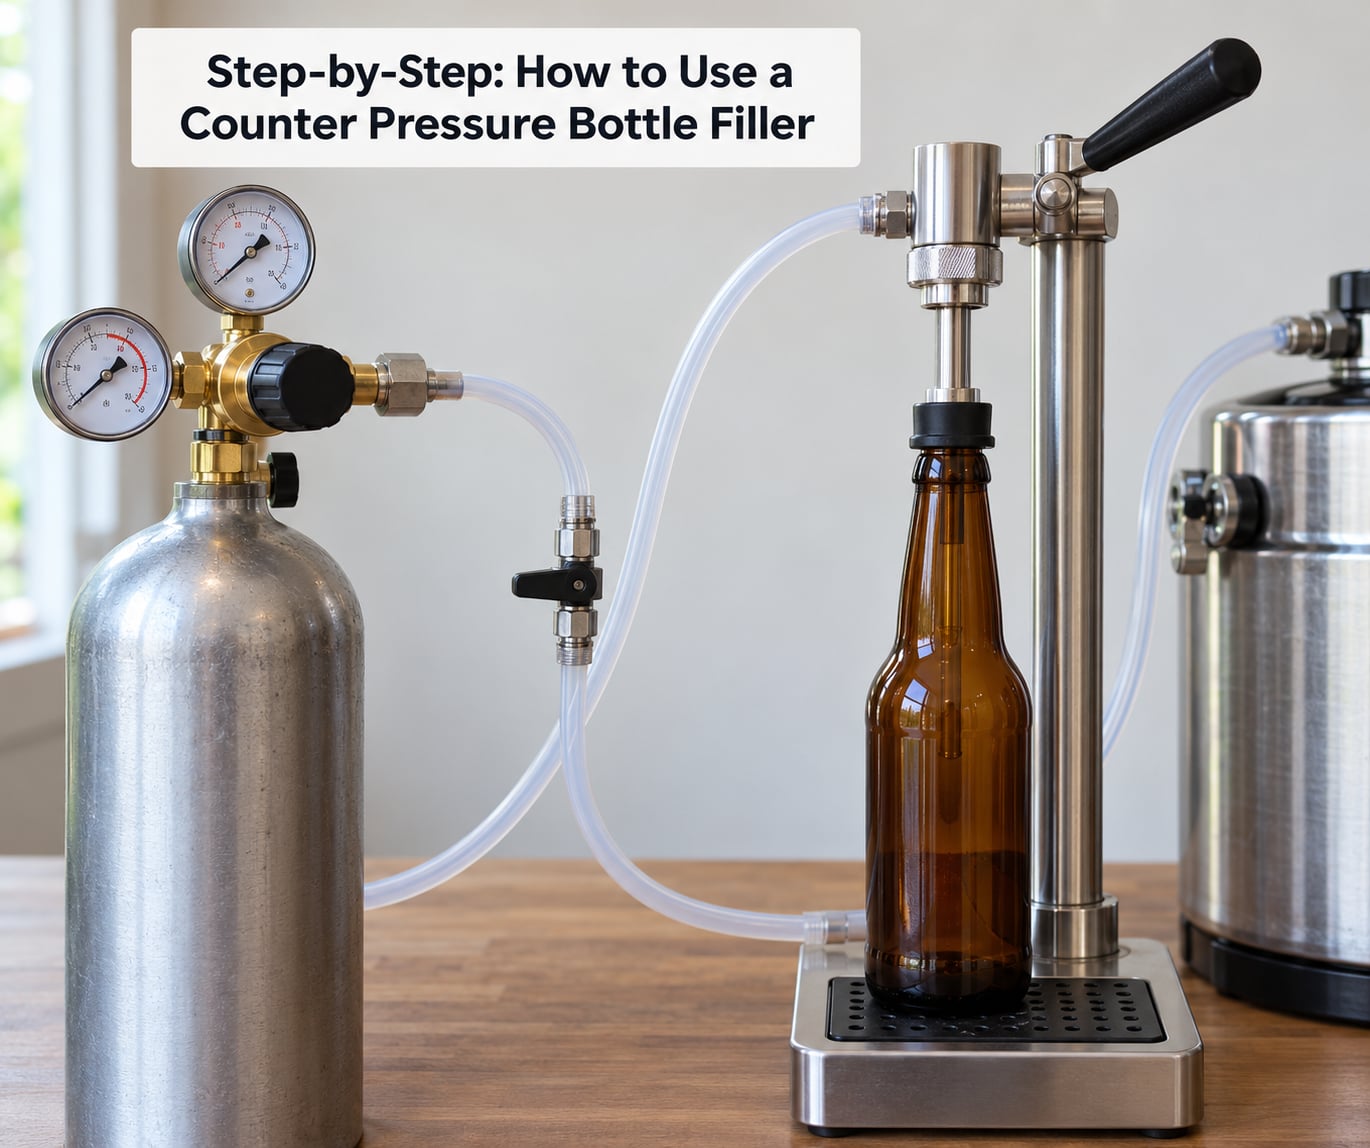
- A CO2 tank with a working regulator, plus a way to feed both the keg and the filler. A T-connector or a two-line manifold does it.
- Tubing matched to the fittings: 1/4 inch for the gas line, 5/16 inch for the beer line from the keg to the filler.
- A bottle capper and crown caps. Crown caps, not corks. The cap has to go on within seconds.
- Sanitizer such as Star-San, PBW, or TSP, plus a spare hose clamp or two.
- A large bowl, pot, or bin to fill over. This is not optional in practice.
- Clean, sanitized bottles in the format you plan to fill, chilled if you can manage it.
A pressure gauge on the filler is nice to have but not required. You can run the whole process on the keg’s own gauge if you trust it and you know the pressure you set.
Step-by-Step: How to Use a Counter Pressure Bottle Filler
How to Use a Counter Pressure Bottle Filler Safely
Before anything pressurized, check the stem and valve for cracks and confirm the O-rings are all present and seated. A filler that arrived with a weeping stem will just leak gas at every step that follows.
Then sort the lines so the two paths never get confused. CO2 enters the gas-in port on the three-way ball valve. Beer from the keg enters the beer-in port. A three-way valve installed backwards will block gas, block beer, or both, and the symptom looks like a broken filler rather than a reversed part.
Run a dry leak test before the first bottle. Turn on the gas, put your thumb over the bleeder, and listen. Fix any fitting with a flared swivel nut or a hose clamp before you involve your beer.
Keep one rule for the whole session: close the bleeder before you close either main valve. Venting gas after you have shut the beer off sprays beer across your counter, and venting after the beer valve closes but with the bleeder wide open wastes the pressure you just built.
And hold the filler by the stem collar, never pushing down on the body while it is under pressure. Push down and the stopper rides up the stem, the seal breaks, and the bottle dumps.
How to Prime the Filler and Avoid Beer Waste
Set the main valve to beer, aim the filler stem into your bowl or bin, and open the bleeder a crack. The first beer that comes through carries whatever was sitting in the stem and the bottom tube, so catch it rather than pouring it into a bottle.
Once beer flows steadily, you are primed. Park the filler over the bin until you are ready to start on real bottles. Keeping it there between bottles keeps the beer path full and wets the stopper, which cuts down on the first gasp of gas when you seat it on a bottle.
Filling over a bowl is normal. Homebrewers on r/Homebrewing describe pulling the filler out and getting a small gush every time, and the standard advice is to fill over something and stop worrying about it.
How to Fill Bottles and Control Carbonation
Sanitize the bottles, drop the filler in with the main valve in the off position, and hold the stopper down with one hand. Flip the valve to gas and let CO2 run for 10 to 12 seconds. That is long enough to displace the air sitting in the headspace without wasting your CO2 on a longer hiss.
Now close the bleeder and pressurize the bottle until it matches the keg, usually 8 to 12 PSI. You can nudge it 2 or 3 PSI over if you want the bottle to still be properly fizzy after a day or two of settling.
Crack the bleeder open just enough to keep the bottle a few PSI below the keg, and beer starts climbing the bottom-feed tube. A good fill takes 5 to 10 seconds. Faster than that and the beer has nowhere to go but up into foam.
Stop with about half an inch of headspace. Close the bleeder first, then the beer valve, then lift the filler straight up without twisting.
Here are the numbers worth memorizing:
- Keg temperature: around 32 F. Cold beer holds carbonation and pours quiet.
- Keg and bottle pressure: 8 to 12 PSI, matched to each other.
- CO2 purge: 10 to 12 seconds.
- Bottle pressurization: until the gauge matches the keg.
- Fill time: 5 to 10 seconds, bottom up.
- Headspace: half an inch, no more.
- Bottle pressure differential: roughly 3 PSI below the keg while filling.
If foam climbs faster than beer, you are filling too warm, filling too fast, or the bottles are warm. Freezing sanitized bottles for 15 to 20 minutes and giving them one more sanitizer blast before they go under the stopper is the trick that comes up most often for cutting foam.
How to Finish, Cap, and Store the Bottles
Cap on a small amount of foam, immediately, one bottle at a time. The foam rises into the headspace and pushes the last of the oxygen out instead of trapping it.
Working a dozen bottles alone means capping fast, which is the one place a second pair of hands earns its keep. If you are solo, set the capper where your hand lands before you pull the filler.
Label the bottles with the beer name and the date. Unlike bottle-conditioned homebrew, counter-pressure bottled beer needs no conditioning time and drinks clean straight away, so you can ship it once the caps have set overnight.
Store the bottles cold and dark for the same reason you stored the keg that way. Then wash the filler in hot water, soak the internals in PBW or TSP to get at the parts you cannot see, and rinse. Run sanitizer through the line and the stem before the filler goes back in the box.
Common Mistakes
Foaming over and losing beer. The beer or the bottles are too warm, or the bleeder is too wide. Drop the keg temperature, crack the bleeder further closed, and fill colder bottles.
Nothing comes out. The bottle has caught up with the keg pressure, so there is no differential left. Purge again and re-pressurize, and check that the bleeder seat and O-ring are clean so gas can actually vent.
The filler pops off or the stopper rides up. You pushed down on the filler body. Hold the stem collar instead, and go easier on 22 oz bombers and 3 L bottles, which need a longer bottom tube. Adding a short length of 1/4 inch hose inside the stem helps it reach the bottom.
Gas leaks at the fittings. Loose hose clamps or barb fittings that were not seated fully. Hand-tighten the clamps, then re-check after the first bottle, because pressure changes seat things.
Flat or weakly carbonated bottles. Headspace was too large, caps went on slowly, or the bottle was pressurized below the keg. Match pressures, cap fast, and stop at half an inch of headspace.
The three-way valve is in backwards. Gas and beer fight each other and nothing moves. Remove it and reinstall it with the gas-in and beer-in ports on the correct sides.
Bad flavors or infection risk. The filler went back in the box without cleaning, or a low spot in the gas line held condensation and water ended up in the beer. Run the gas line without any dips and sanitize the filler after every session, not just before the next one.
Frequently Asked Questions
What pressure should I use with a counter pressure bottle filler?
Match the bottle to the keg, which for most ales and lagers means 8 to 12 PSI. The exact number matters less than the two pressures being equal. If you nudge 2 or 3 PSI over the keg setting, the bottle settles into range after a day or two.
Can I use a counter pressure bottle filler with a keg?
That is exactly what it is built for. Run the beer line from the keg to the beer-in port on the filler and feed the gas-in port from the same CO2 tank. A T-connector or two-line manifold keeps both at the pressure you set on the regulator.
How cold should the beer be when using a counter pressure bottle filler?
Around 32 F if your fridge will hold it. Cold beer holds carbonation in solution and pours quietly, which is the single biggest factor against foaming. Warm kegs and warm bottles are the usual reason a fill turns into a gushing mess.
Why does my beer foam heavily while filling bottles?
Usually temperature, then flow rate, then pressure. Beer above 40 F foams no matter what you do. Beyond that, a bleeder opened too wide floods the bottle faster than the headspace can absorb, and a bottle pressurized above the keg pressure pushes foam out as fast as beer comes in.
How long should beer carbonate after counter pressure filling?
It is already carbonated when you cap it, so there is no waiting period. Give the bottles overnight in the fridge before you ship or open them, mostly to let any foam settle and the caps to seat fully. Homebrewers fill and drink the same day often enough.
Do I need to purge the receiving bottle before capping it?
Purge before filling, cap after. The 10 to 12 second CO2 purge clears oxygen out of the empty bottle so the beer displaces gas rather than air. Once beer is in, you cap straight away on a small amount of foam, which takes care of the remaining headspace.
Conclusion
Sanitize and inspect the filler, confirm the valve orientation, and leak-test the gas line before the keg ever comes into it. Then chill the keg and the bottles, set the regulator to your target pressure, and fill one bottle all the way through as a trial. Check the fill, the headspace, and the carbonation the next day. Once that first bottle is right, the rest is repetition.