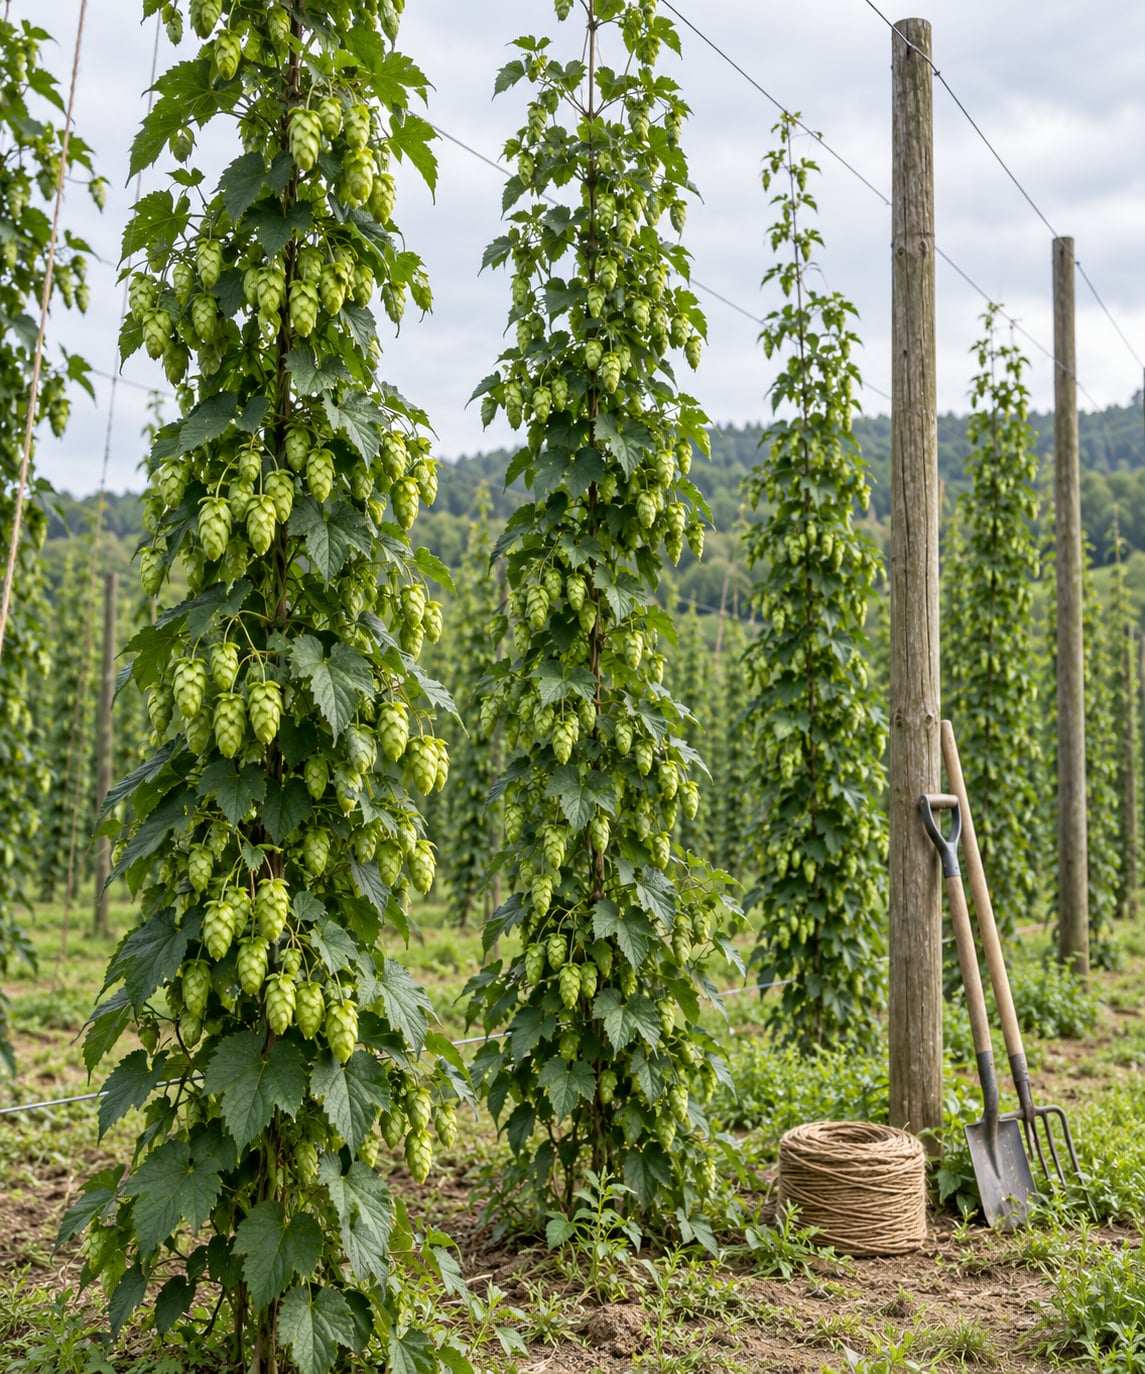
Hops are grown from underground rhizomes that send up ropey stems each spring, and those stems are trained clockwise up a wire trellis until they top out around 18 to 20 feet. The female plants flower in midsummer, and the hop cones they produce are picked in late summer or early fall, then dried and baled within hours. That is the short version of how hops are grown and harvested, and everything below breaks it into the parts a grower actually manages: the site, the trellis, the training, the maturity check, the pick, and the drying.
What follows is a look at a full hop season from the inside, the kind of view a craft brewery person gets after visiting enough hop yards to know which questions are worth asking. It covers commercial towers and back-yard poles alike, because the biology is the same even when the scale is not.
Table of Contents
- What Is a Hop Plant and Why Do Breweries Care?
- How Hops Are Grown and Harvested: From Planting to Storage
- How Hops Are Grown and Harvested Step by Step
- How to Prepare a Planting Site for Hops
- How Hop Vines Grow and Climb
- How Growers Know When Hops Are Ready to Harvest
- How Hops Are Harvested from the Trellis
- How Fresh Hops Are Dried and Cured
- What Happens After Harvest: Baling, Testing, and Storage
- Where Do Hops Grow Best?
- How Much Can One Hop Plant Produce?
- What Problems Can Damage a Hop Crop?
- Frequently Asked Questions
- How long does it take to grow hops from rhizomes?
- When are hop cones ready to pick?
- Do hop plants die after the growing season?
- How are hop cones dried after harvest?
- How much does one hop plant produce?
- Can hops grow in a home garden?
- Conclusion
What Is a Hop Plant and Why Do Breweries Care?
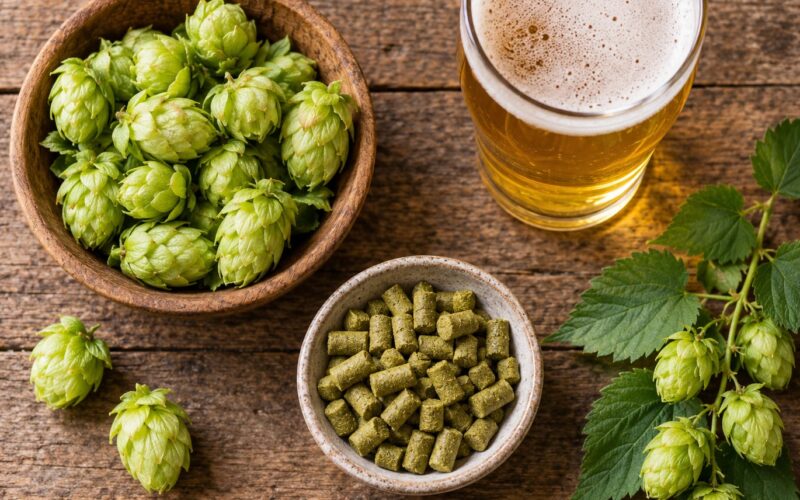
A hop plant, Humulus lupulus, is a perennial climbing vine in the hemp family that dies back to the ground every winter and regrows from a permanent crown. Breweries care about one part of it: the female flower, a compact cone also called a strobile, packed with glandular trichomes known as lupulin glands.
Those glands hold alpha acids, beta acids, and essential oils. Alpha acids turn into bitterness during the boil, beta acids add bitterness and some antimicrobial effect, and the essential oils supply the flavor and aroma. Without hops, beer would be sweet and thin-bodied, and would spoil faster.
Two vocabulary notes matter before reading further. Hops are often called vines, but growers say bines, because the stem twists around the support string rather than clinging to it with tendrils or suckers. And the crop comes only from female plants, so growers keep males out of the yard entirely.
A mature female bine can produce hundreds of cones, and the same variety picked at the right moment can be used as a bittering hop early in the boil or as an aroma hop late in it, or added fresh and never boiled at all.
How Hops Are Grown and Harvested: From Planting to Storage
How hops are grown and harvested comes down to one annual rhythm that repeats every year. A grower picks disease-free rhizomes or crowns, sets them into prepared soil in spring, hangs a string from the top of a permanent support, trains the new bines up that string, keeps them watered and watched through summer, and pulls the cones down in early fall. Within hours of picking, the cones are on a drying kiln or a dehydrator. The dried crop is conditioned, tested, baled, and stored cold until a brewery calls for it.
How Hops Are Grown and Harvested Step by Step
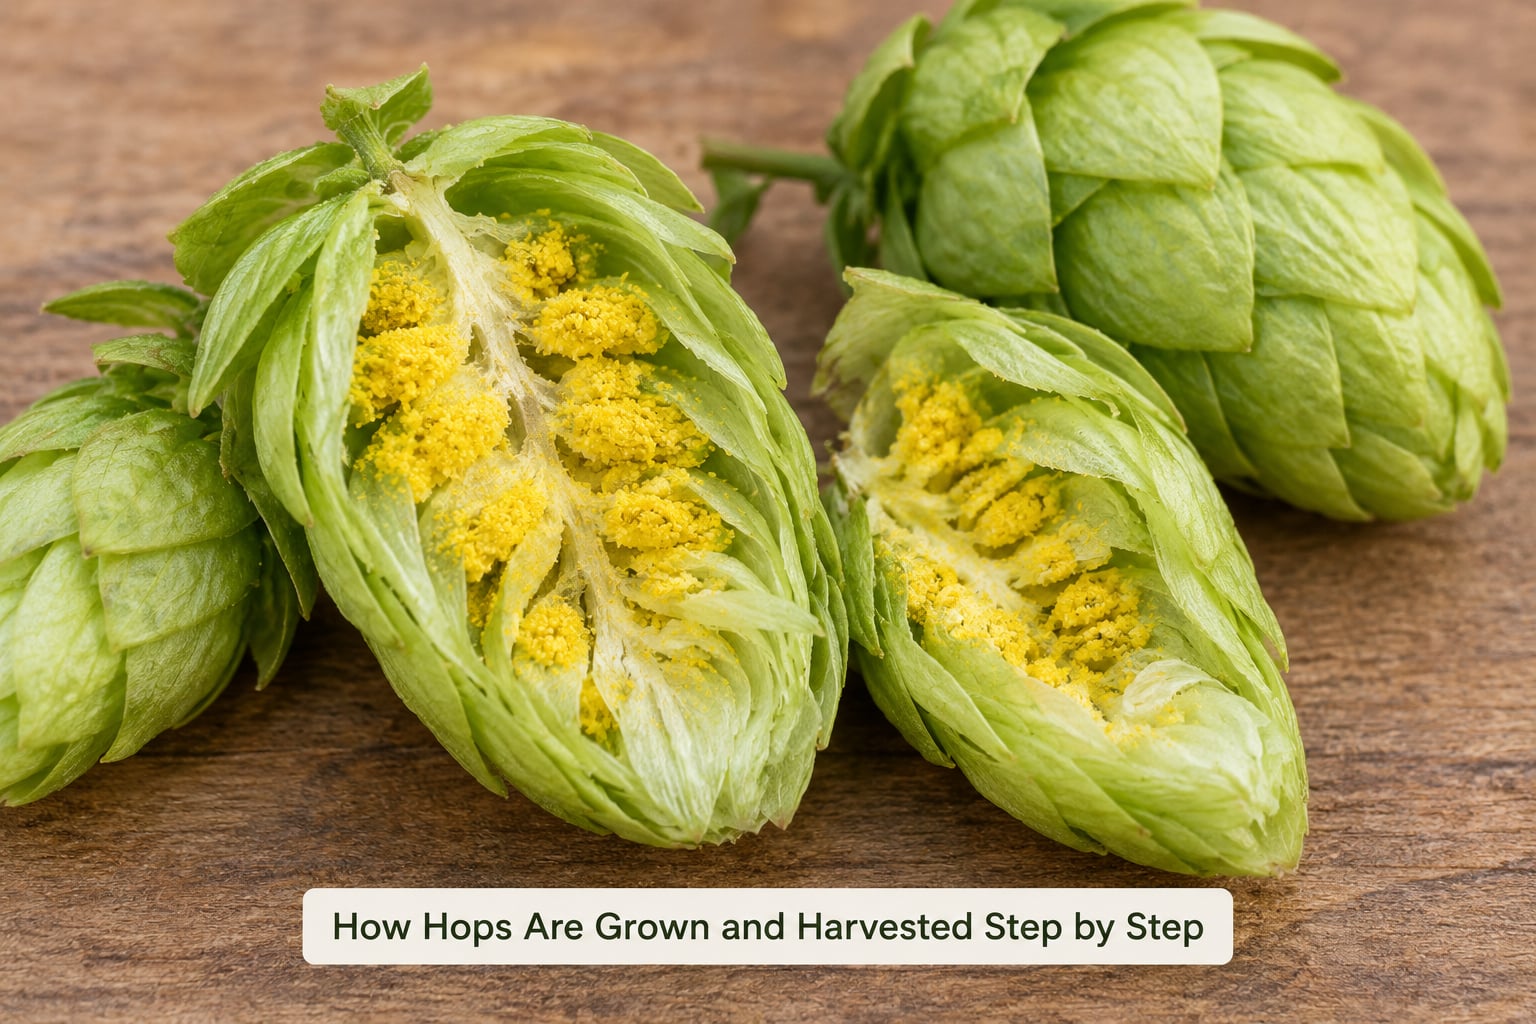
Here is the crop cycle in the order it happens, whether the yard is a commercial tower block in the Yakima Valley or a single pole in a back yard.
- Select planting stock. Most growers buy dormant rhizomes, bare root crowns, or potted plants from a certified nursery. Field-grown stock carries a higher disease risk than greenhouse stock, so commercial operations pay for disease-free liners.
- Prepare the site and support. The trellis goes in before the plants do. Posts and wire are cheap insurance; rebuilding a top wire in July with 15-foot plants already on it is a bad week.
- Plant in spring. Rhizomes are set a few inches deep, crown down and shoots up, spaced roughly 5 to 7 feet apart within a row and 10 to 12 feet between rows. Warm soil above about 50°F gets the shoots moving.
- Train the bines. Each shoot is wrapped onto a fresh twine, usually wound clockwise, and the twine hangs from the top wire to a weight on the ground. Growers keep two to four bines per crown and pinch off the weak extras.
- Support and irrigate. Once the bine clears the top of the trellis it stops climbing and produces side arms that fan out horizontally and carry most of the cones. Drip or soaker irrigation on a timer matters more than anything else during heat.
- Manage the canopy. Lower leaves are stripped early in the season to open airflow and make scouting easier. Suckers and low shoots are removed, and the grower walks the yard looking for the first disease signs.
- Watch the flowers develop. Small clusters appear in early summer, elongate, and fill out into cones. Cone count matters less than cone size and resin content at this point.
- Test for readiness. Cones get sampled from several bines, not just the easiest one, and checked for color, density, aroma, seed development, and dry matter percentage.
- Harvest. The bines are clipped, cut, or fed into a mechanical stripper, and the cones move straight to the dryer. Fresh cones start losing quality fast, so the gap between vine and kiln is kept as short as possible.
- Dry and cure. Warm air at controlled temperature and humidity pulls moisture out over roughly six to twelve hours on a commercial kiln, longer on a small dehydrator.
- Condition, test, bale, store. The dried hops rest, get weighed and sampled for moisture, density, alpha acids, and storage index, then get baled or packed and moved into cold storage.
Nothing in that list is complicated on its own. What makes hop farming hard is that every stage is a weak point, and a bad August can undo an otherwise perfect April.
How to Prepare a Planting Site for Hops
A good hop site is sunny, drains fast, and can be reached by a pickup or a harvester. Hops want full sun, at least six hours a day, and plenty of room, because a mature bine spreads laterally from the crown through runners and will happily take over a neighboring bed.
Soil pH is usually kept between 6.0 and 7.5, and drainage matters more than fertility. Hops tolerate a wide range of soils but will decline fast in standing water, and a single wet week at the wrong moment can trigger root problems that never fully resolve.
Plan for access before you plant. A 20-foot trellis needs a ladder, a platform, or a machine, and you want that equipment to reach the top wire without trampling the row. Rows that are too narrow turn every harvest day into a squeezing job.
| Growing system | Typical height | Plants per site | Harvest method | Best for |
|---|---|---|---|---|
| Back-yard pole or fence line | 10 to 15 feet | 1 to 3 | Hand picking with a step ladder | Homebrewers and first-time growers |
| Long trellis over a row | 18 to 20 feet | 5 to 10 per pole line | Ladder picking or small machine | Small farms and serious hobbyists |
| Commercial tower with cables | 18 to 21 feet | 20 to 40 per acre and up | Mechanical stripper and conveyer | Farm-scale production and fresh-hop contracts |
Container growing is the option home growers ask about most on gardening forums. It controls the spread, which matters in a shared yard, but roots run out of water and root volume fast, and yields drop. Some people bury the pot, or set a wide fabric or plastic barrier in the ground around the crown, to get most of that control without the yield penalty.
How Hop Vines Grow and Climb
Hop bines wrap around the string clockwise because the stems are round and slightly ridged, and that ridging makes them twine. They cannot grip a flat surface on their own, which is why a trellis needs twine rather than a wire the bines can hold.
Growth in spring is explosive. A shoot can add a foot or more in a day in warm weather, which is why the training crew works the yard almost daily in late spring. Once the leader reaches the top of the support, it stops and sends out side arms, and the plant switches from vertical growth to spreading width. Those side arms produce the bulk of the cones.
At the base, the plant is doing something less visible but more important. The crown builds root mass and stores starch that carries it through winter dormancy. The bine you cut down in fall is a single-season structure; the crown beneath it is the perennial.
That is also why the fall cut matters. Leaving dead stems standing invites pests and disease to overwinter in the yard, so most growers cut to within a few inches of the crown once the crop is off and remove the debris from the field.
How Growers Know When Hops Are Ready to Harvest
Cones are ready when they turn from pale green to a deeper yellow-green, feel dense and springy rather than soft, and smell like the variety’s own flavor. When you squeeze a ripe cone between your fingers it should spring back, and the inner cone should stick to your skin. A pale, limp cone with no stick is still weeks away, and a brittle one that crumbles has passed its window.
Look at the seed, or strobile, inside a few split cones. Slight to moderate development is usually fine; heavy seed set tends to show up in varieties that ripen late and is a hint that the plant had a lot of heat and daylight. Cone density matters more to brewers than seed count, so the seed is a supporting signal, not the whole test.
The most useful number is dry matter, the percentage of the cone’s weight that is not water. Target ranges run roughly 20 to 25 percent, with some varieties harvested a little wetter and others drier. When a sample comes off the plant at 18 percent, the crop keeps gaining weight for brewers, and the bales get heavier. When it passes 28 percent, the cones have started turning to paper and shatter, and the bines get brittle in the wind.
Getting that measurement takes a kitchen scale and a small oven. Pull a representative sample, weigh it fresh, dry it until the weight stops changing, weigh it again, and divide. Growers who have never done it usually overpick because the smell alone is misleading in the warm, still air of early morning.
Timing is a short window, often seven to ten days once the crop turns. Cone density climbs steeply in that period, and after it, the risk changes: rain before the pick can wash out essential oils, hail can shred the cones, and a hot dry spell can brown them and cause lupulin to go dull.
How Hops Are Harvested from the Trellis
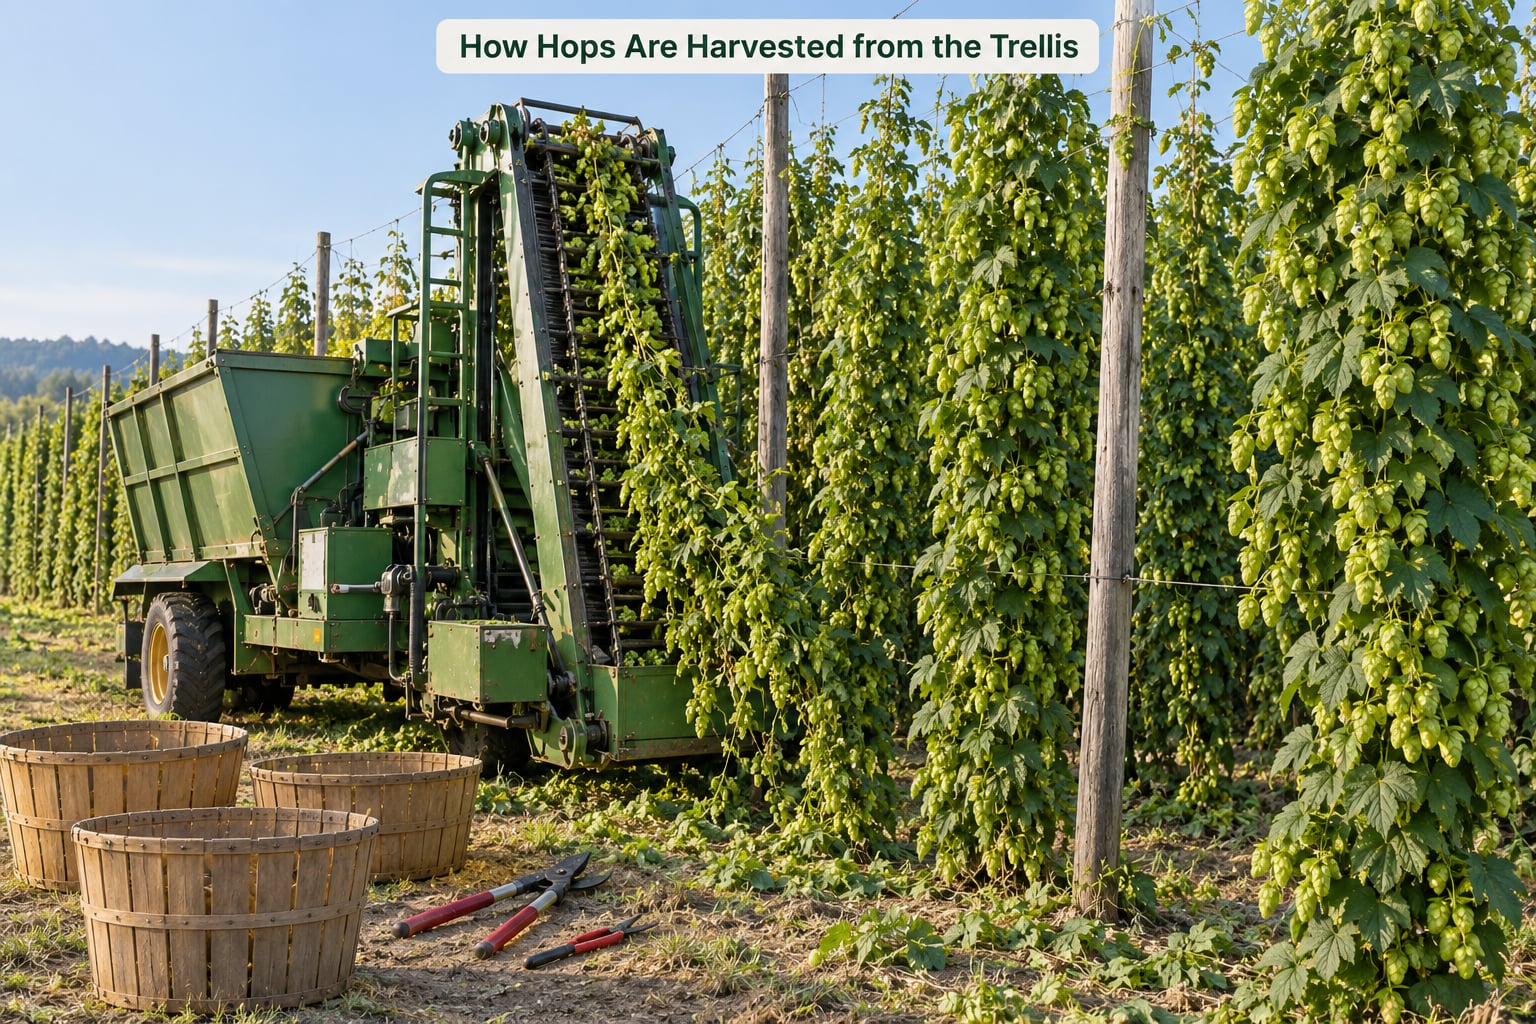
On a home scale, picking means a ladder, a pair of clippers, a tarp, and a lot of reaching. Growers cut the bine in sections, or clip the bine’s side arms cone by cone, and let everything fall onto a sheet below. It is slow, hard on the shoulders, and it has one big advantage over any machine: the picker chooses which cones go in the bin.
Ladder picking is the same idea with the bine lowered in sections, which is faster but requires two people and more handling. Once the stems are down, the cones are stripped off by hand or with a small stripper, and vines and leaves are separated from the cone mass. Skin irritation from hop bine hairs is the most common complaint, and long sleeves plus gloves solve it.
Commercial harvesters are wire or plastic strippers, sometimes a rotating comb or a spiked drum, that grab the bine and rip the cones off while the vine feeds through. A self-propelled harvester works one row at a time, dropping cones onto a belt that feeds a trailer. The whole point of the machine is speed, because a mature acre can produce a lot of wet cone in a few hours, and wet cones heat, wilt, and bruise fast once they are off the plant.
That is the constraint that shapes every harvest day. Pickers who worked on fresh-hop deliveries describe the same rule: get the cones into the dryer within roughly 45 minutes of coming off the vine. A brewery that wants wet hops has to be close enough to the farm to make that window.
How Fresh Hops Are Dried and Cured
Drying is not cooking. The goal is to remove moisture while holding the essential oils, the color, and the shape of the cone. Temperature stays in a controlled range, usually somewhere around 120 to 140°F at the air side of the kiln, and the air is moved constantly rather than sitting still.
Commercial kilns are a room or a two-story box with a perforated floor, a drying air source, heat, and a fan. Hops sit on the floor in a layer a foot or two deep, and the operator checks temperature and moisture at several points, because hot and cool spots show up in any pile. Air that is too dry and too warm burns off aroma; air that is too wet leaves the crop vulnerable to mold once it is baled.
Small-scale drying gets the same result with different equipment. Food dehydrators at a low setting work well, and home growers on homebrewing forums report success with window screens in a hot dry room, a rack in a garage, or a cabinet with a fan and a gentle heater. The keys are airflow, turning the hop layer, and not letting a single thick pile sit unturned for days.
Turning is the unglamorous part that matters. Fresh cones are sticky, and without movement they mat together, trap moisture in the middle, and heat themselves. Turning every few hours in the first day, then once or twice a day after that, keeps the layer even and lets the grower read moisture by feel.
Timing scales with volume. A home dehydrator with a few pounds of hops can take 12 to 24 hours. A commercial kiln moves a full load in six to twelve hours. The pull test is simple: a dried cone should snap rather than bend, feel brittle at the stem, and weigh in near the target dry matter.
After drying comes curing or conditioning, a resting period of a day or several where residual moisture redistributes through the cone. Then comes packing.
What Happens After Harvest: Baling, Testing, and Storage
Baling follows drying. Hops are baled at a low pressure, historically around 200-pound bales, because a dense bale can bruise and shatter the cones inside it and lets moisture migrate into one corner. Modern lots get layered into smaller boxes or tote bags with a liner so different lots do not mix.
Every lot gets a label with the variety, field, harvest date, and net weight, and that label is how a brewery knows what it is buying two years later. Small farms that skip this step end up with a mystery pallet, and the mystery pallet never sells for what it should.
| Measurement | What a grower records it for |
|---|---|
| Net weight per lot | Billing, yield tracking, and comparing blocks year over year |
| Moisture content | Confirms the crop is storage-stable rather than mold-prone |
| Alpha acids | What the brewery needs to calculate bittering units for a kettle |
| Beta acids | Flavor and oxidation behavior, useful for hop blends |
| Hop storage index | How fast the alpha acids have degraded since harvest; higher means older material |
| Essential oil profile | Batch consistency, and whether a variety is delivering the aroma it should |
| Seed and plant matter content | Quality flag; excess stems or seed lowers the usable cone fraction |
Storage is cold, dark, and as airtight as practical. Lots are held just above freezing with low humidity, and handled so the bales are not dragged across concrete. Heat, light, and oxygen together are what the hop storage index is measuring, and they are the reason a three-year-old lot tastes like cardboard no matter what the label said at harvest.
Some hops never get stored as bales at all. A portion of the crop goes straight to a pelletizer, where the dried hops are milled, sometimes under a protective atmosphere of carbon dioxide, and packed as Type 90 pellets, which lose less than 10 percent of their weight to plant matter. Extracts and freeze-dried cryo hops come out of the same dried crop. Nothing about the harvest changes; the form the brewery buys does.
Where Do Hops Grow Best?
Hops need a long, warm, sunny growing season, plenty of water, and a trellis that can hold 20 feet of plant. They also need a hard winter dormancy, which is why the crop stops growing well before the first frost and does not appreciate a mild winter followed by an early spring push.
The Pacific Northwest dominates world production, and Washington state grows the large majority of the hops produced in the United States. The Yakima Valley and the Columbia Basin give growers long days, dry summers, controlled irrigation from mountain snowpack, and infrastructure for processing hundreds of acres. Idaho and Oregon add acreage nearby.
Outside the Northwest, the pattern changes in ways that matter. The Northeast, from New York through New England, gets reliable moisture and a strong tradition, but its heavier summer humidity makes downy mildew a far bigger threat than in the arid West. Wisconsin and Michigan have rebuilt real hop industries in the last fifteen years, with universities working on downy mildew and halo blight management and growers leaning on greenhouse-supplied disease-free plants. Michigan went from no harvested acres in 2012 to several hundred within a few seasons, and then past 800 acres.
Every new region hits the same two walls. Disease pressure that the dry Pacific Northwest barely sees, and a shortage of nearby kilns and pelletizers, which makes a wet-hop contract impractical if no brewery is within driving distance.
How Much Can One Hop Plant Produce?
A newly planted rhizome gives you a single bine and a handful of small cones in year one. That crop is not worth harvesting for much, and most growers cut it off to push energy into the crown instead.
By the second and third year, home growers typically report somewhere around 2 to 4 ounces of dried hops per vine, and those numbers climb as the plant matures. A healthy established bine at home scale often lands somewhere around 1 to 2 pounds of dried hops. That is the range most homebrewers describe, and it is plenty for a homebrew supply.
Commercial yields are quoted per acre rather than per plant, and they swing hard with variety, irrigation, disease pressure, and how long the growing season ran. Nobody should promise you a number from a general article, and any figure a seller gives you for a first-year plant is a best case.
What does lift yield reliably: steady water, a full season of sunlight, a well-built trellis that lets the plant use its whole height, and scouting often enough to treat a problem in week one instead of week four.
What Problems Can Damage a Hop Crop?
Downy mildew, caused by Pseudoperonospora humuli, is the disease that ends hop careers. It shows up in spring as stunted, pale shoots with downy growth underneath, and it can take a planting in weeks. Management is prevention: resistant varieties, clean stock, airflow through stripped lower leaves, and a spray program that starts on a schedule rather than when symptoms appear. Michigan State researchers have worked on downy mildew and halo blight for years, and the takeaway from their work is consistent. Prevention timing beats rescue, every time.
Halo blight is the newer worry, showing up in the Great Lakes region and elsewhere, causing cone lesions and aborted bines with few treatment options. Growers in affected areas lean on tolerant cultivars, sanitation, and cutting out infected material early.
Powdery mildew shows as a white coating on leaves and can stunt growth, though it usually does less damage than downy mildew. Aphids and spider mites feed on the underside of leaves, and spider mites are the one home growers complain about most. Sticky leaves, fine webbing, and stippled damage are the signs. A strong jet of water, insecticidal soap, or isopropyl alcohol at a dilution of roughly one part alcohol to ten parts water knocks down light infestations, and repeat treatments matter more than the first one. Predatory mites work well in commercial blocks.
Japanese beetles skeletonize leaves in midsummer. Birds peck at the tops of bines, where the cones are densest and the vines are hardest to cover.
Weather causes more lost crop than insects in a bad year. Hail shreds cones and bruises the tissue underneath, and damaged tissue is where disease starts. Wind at 40 knots lays over top-wire trellises and snaps bines. Heat above 100°F during flowering cuts cone set, and drought stress before harvest costs weight and aroma.
And then there is spread. Hop runners creep into neighboring beds, over fences, and into a neighbor’s yard, which has ended more than one home growing friendship. Barriers, containers, and prompt runner removal are the whole fix.
Frequently Asked Questions
How long does it take to grow hops from rhizomes?
A hop rhizome sends up its first shoot within a few weeks of spring planting, and that shoot can reach the top of an 18-foot trellis in about two months. The first year is mostly building crown and root mass, so most growers cut off that early crop. Expect a meaningful harvest in year two, and full yields in year three and after.
When are hop cones ready to pick?
Cones are ready when they turn a deeper yellow-green, feel dense and springy, and stick to your fingers when squeezed, usually in late August through early September depending on variety and latitude. Most growers sample several bines rather than one and check dry matter, aiming for roughly 20 to 25 percent. The usable window is often only seven to ten days.
Do hop plants die after the growing season?
The above-ground bine dies, but the plant itself is a perennial. After harvest, the stems are cut back to a few inches above the crown, the debris leaves the yard, and the crown goes dormant underground until spring. Cut the stems down every year. Leaving them standing lets pests and disease overwinter in the trellis.
How are hop cones dried after harvest?
Drying removes moisture while protecting the essential oils. Commercial kilns use controlled warm air, around 120 to 140°F on the air side, with constant airflow and a hop layer that gets turned regularly. Small-scale growers use food dehydrators, racks, or a cabinet fan. Expect 6 to 12 hours in a kiln and 12 to 24 in a home dehydrator, until cones snap instead of bending.
How much does one hop plant produce?
Home growers usually report 2 to 4 ounces of dried hops from a vine in years two and three, rising to roughly 1 to 2 pounds once the plant is fully mature. A first-year plant may give you nothing worth drying. Variety, irrigation, disease pressure, and how long the season runs all change the result, so treat any single number as a snapshot rather than a promise.
Can hops grow in a home garden?
Yes, in USDA zones roughly 4 through 8, given full sun, fast drainage, and a support that can hold 15 to 20 feet of bine. A pole, fence line, or long trellis all work, and a single pole usually carries one to three plants. The main complications are the bines running at neighbors through runners and the bine hairs irritating skin, both manageable with gloves and a barrier.
Conclusion
The hop season runs in one loop: crown, bine, flower, cone, pick, dry, bale, store, and back to the crown. How hops are grown and harvested is mostly a matter of timing done properly, from a trellis built before planting to a dryer running within the hour of picking.
If you are starting a planting this year, the first thing to get right has nothing to do with harvest. Pick a sunny site with fast drainage, put up a support you will still like in five years, and buy clean stock. Everything from the training in May to the pick in September is easier when those three decisions were made properly in April.