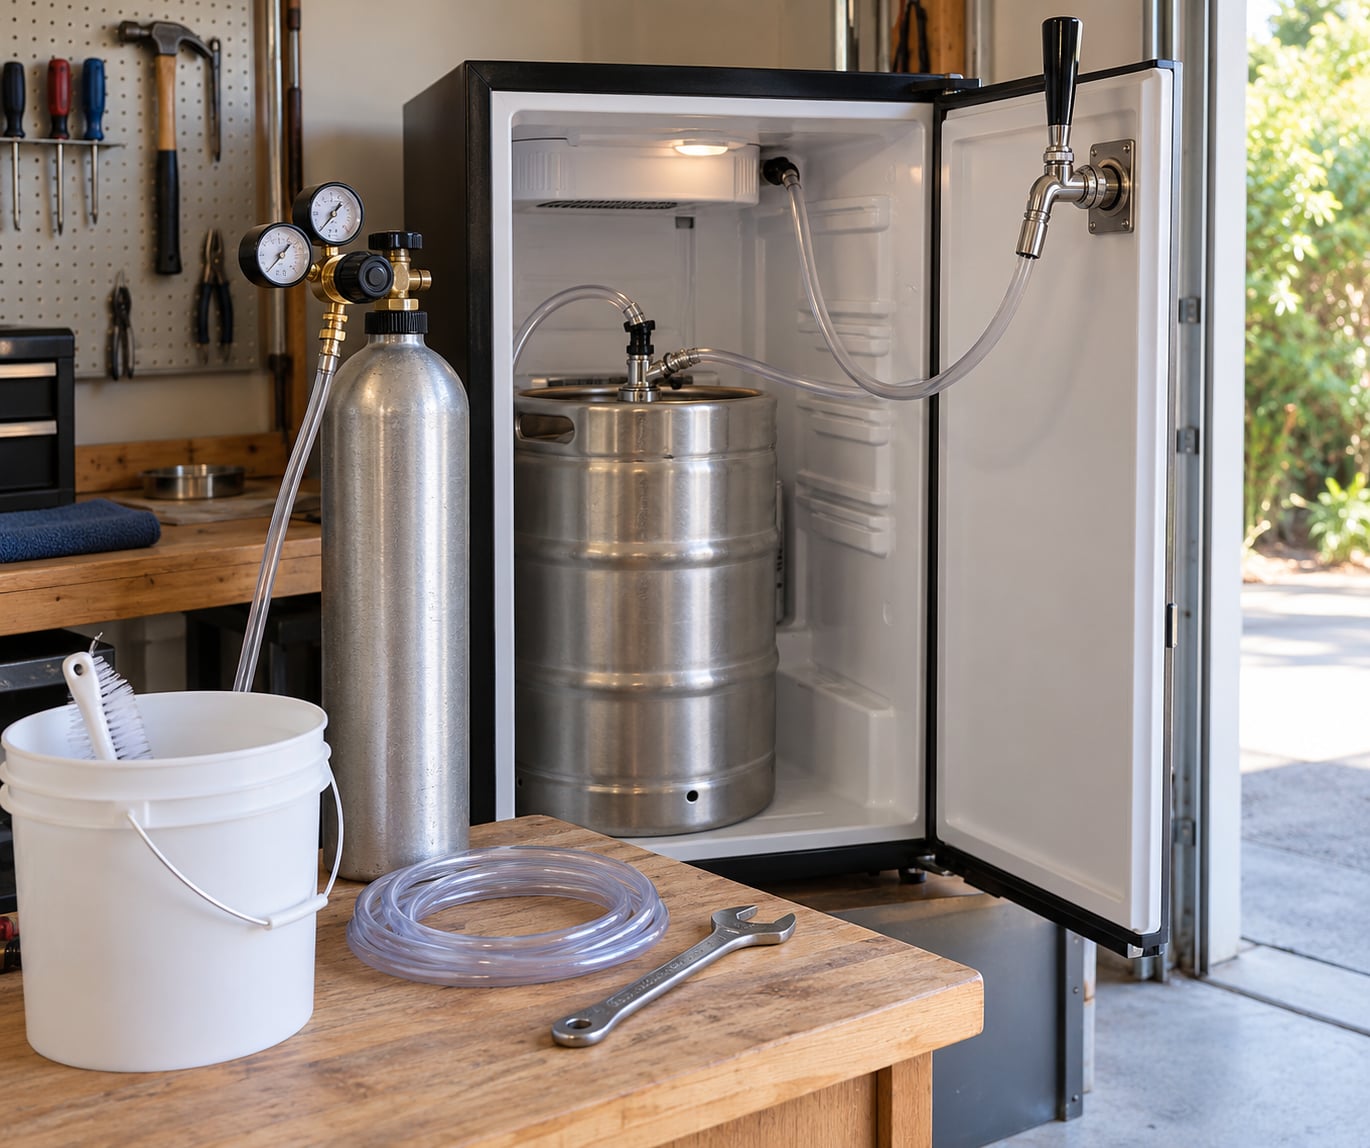
Yes, a kegerator needs CO2. The gas is what pushes beer out of the keg and through the faucet, so a kegerator setup for beginners starts with a cylinder, a regulator and two lines, not just a fridge. Get those right and your first pour tastes like draft beer instead of warm soda water. If you are starting from a plain refrigerator, the conversion takes longer and involves drilling the door, which is where most beginners first get stuck.
The whole job falls into six stages: prepare the fridge, clean the contact parts, install the cylinder and regulator, run the beer line and faucet, seat and tap the keg, then chill everything and make the first pour. Give yourself a calm afternoon the first time, because the slow parts are cleaning and leak checking, not the assembly itself. Most of the work is plugging things into other things.
Table of Contents
- What You Need
- Step-by-Step Setup
- Step 1: Inspect and Prepare the Kegerator
- Step 2: Clean and Sanitize the Contact Parts
- Step 3: Install the CO2 Cylinder and Regulator
- Step 4: Connect the Beer Line and Faucet
- Step 5: Insert and Tap the Keg
- Step 6: Chill the Kegerator and Make the First Pour
- Common Mistakes and Quick Fixes
- The beer comes out flat
- Too much foam
- Weak or absent pour
- Leaking coupler or faucet
- Temperature will not hold
- Off or bad flavours
- Hissing from the cylinder
- Frequently Asked Questions
- What pressure should I use for a beginner kegerator?
- How cold should a kegerator be for draft beer?
- Do I need a beer line for a single-tap kegerator?
- How do I fix a kegerator that pours too much foam?
- Can I use a sodastream-style CO2 cylinder?
- How often should I clean and sanitize a kegerator?
- Start With the Pressure, Not the Pour
What You Need
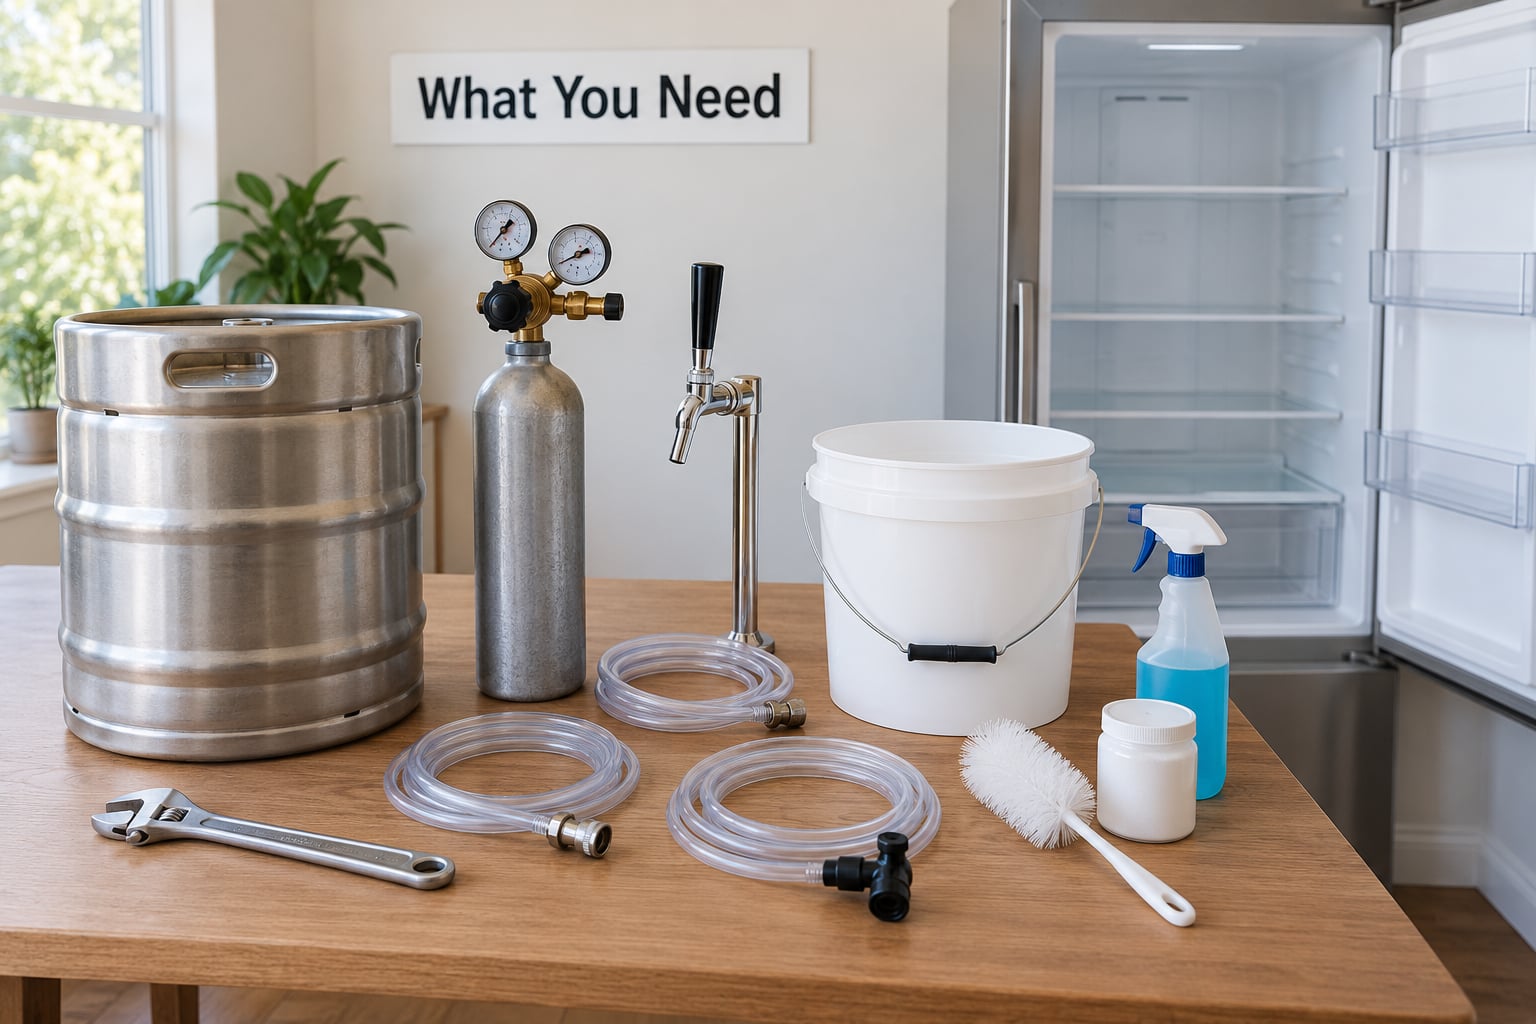
Here is the honest list. Gather everything before you start, because a missing clamp at 9pm with a half-built system is the most common way a first setup gets abandoned.
- Kegerator or suitable refrigerator — either a purpose-built unit or a fridge with no freezer compartment, large enough to hold a full-size keg with clearance to lift it in and out.
- Half-barrel or sixth-barrel keg — a Cornelius (S-type) or ball lock. Ball locks are easier for beginners because the coupler locks and releases with two hand levers.
- CO2 cylinder with regulator — the largest cylinder that fits your space. Bigger cylinders mean fewer refill trips.
- Low-pressure (single-stage) regulator — for a one-tap system this is all you need. It has one gauge showing the pressure reaching the keg.
- Gas line — 5/16-inch ID tubing from the regulator to the coupler, plus an inline filter if you want one.
- Beer line — 3/16-inch ID tubing rated for beverage contact, long enough to route from the coupler up to the faucet.
- Dispenser or faucet with a mounting shank, gasket and nut, and ideally flow control. Flow control lets you slow a pour down without touching your pressure settings.
- Coupler that matches your keg — S-type for Cornelius, D-type for some imported and draft-only kegs. This is the single most common mismatch.
- Hose clamps — single-ear clamps and a pair of pincers for tightening.
- Cleaning supplies — food-compatible line cleaner, a separate sanitizer, and a bucket. Never mix the two products.
- Basic tools — screwdriver, faucet wrench, adjustable wrench, utility knife, and a towel for drips.
Optional but useful: a second regulator for a two-tap build, a tower cooling fan if the faucet sits far from the coldest part of the cabinet, and casters so you can roll the unit for cleaning.
Match every part to the appliance and keg makers’ instructions. If your faucet came with the tower, its own shank and gasket are already sized for it — do not mix components from different brands unless the thread and shank lengths match.
Step-by-Step Setup
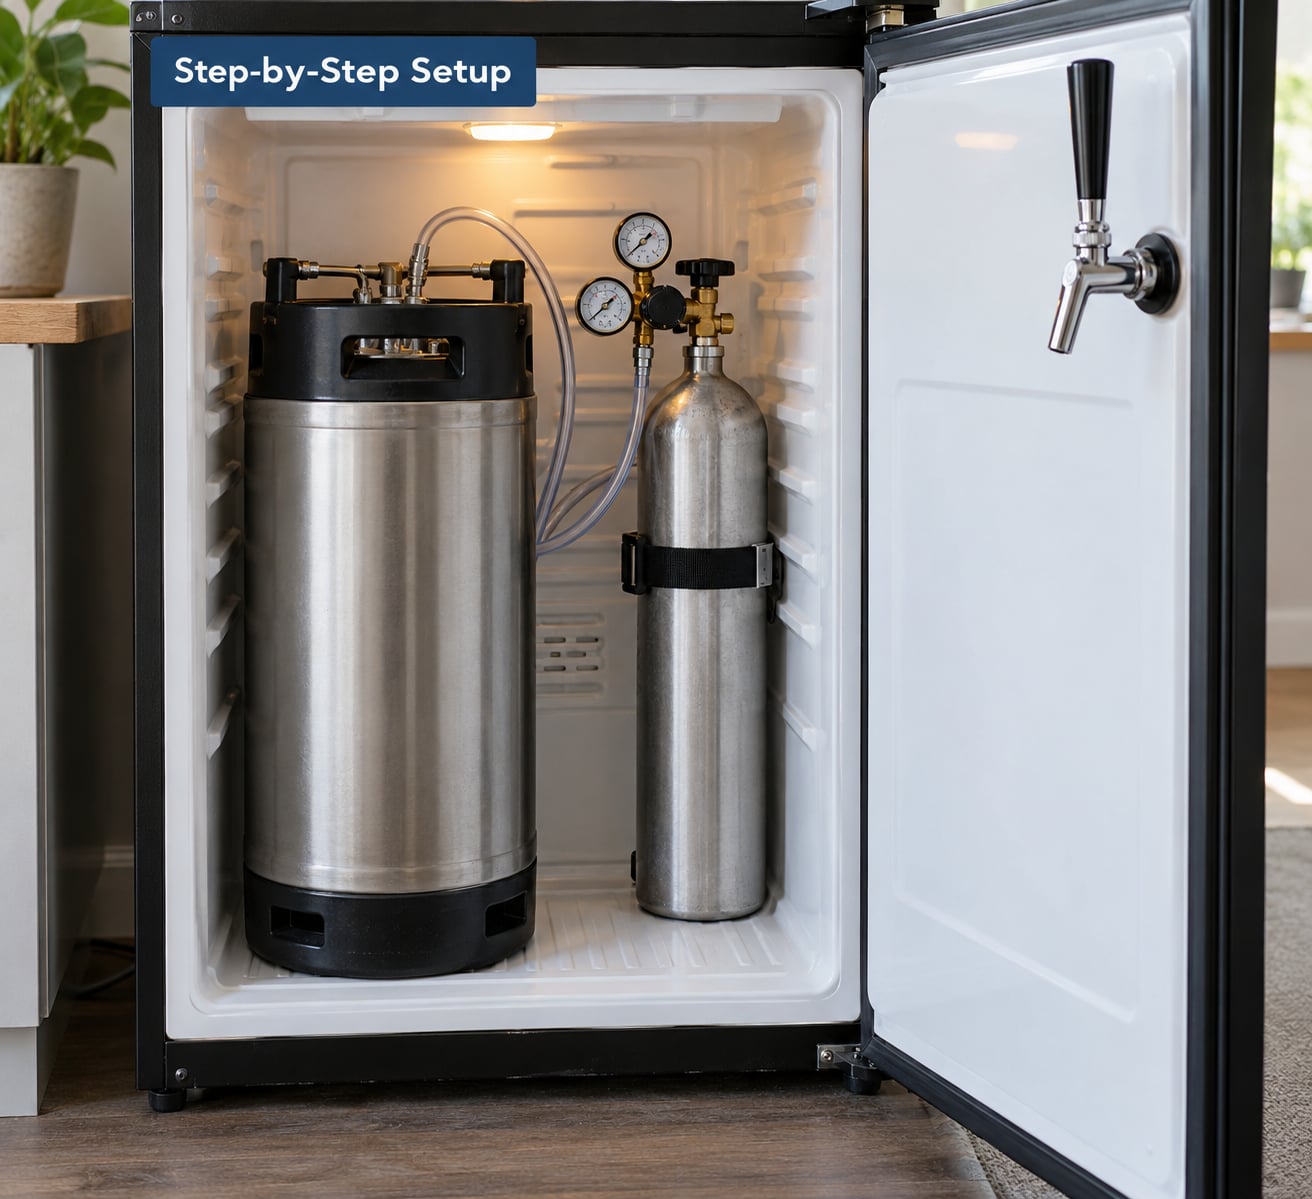
Step 1: Inspect and Prepare the Kegerator
Check the appliance before anything goes inside it. Look for dents in the body, a door seal that closes cleanly, and shelving that holds steady when loaded. Confirm the unit can actually hold the keg size you plan to use, with room for your hands to lower it in.
Read the manufacturer’s installation and ventilation instructions and follow them. Leave the required clearance around the condenser coils, plug the unit into a grounded outlet on a dedicated or appropriately rated circuit, and let it run empty for a few hours before you load anything. That pre-cool is the step people skip and then blame for warm beer all summer.
For a converted fridge, remove the door shelves and any factory light assembly in the way, and keep the door hinge pin accessible so the door can still come off if you ever need it out. Success looks like an empty cabinet, shelves firmly seated, and the compressor cycling quietly.
Step 2: Clean and Sanitize the Contact Parts
Cleaning and sanitizing are different jobs. Cleaning removes residue; sanitizing kills what cleaning left behind. Do them in that order, with a rinse in between.
Run the cleaning solution through the beer line and faucet according to the product directions, then rinse thoroughly with clean water until no suds or smell remain. Sanitize the same path with the sanitizer, using the contact time printed on its label. Follow it with another clean water rinse if the product instructions call for one.
Wash the coupler by hand, paying attention to the gasket seat and the gas inlet post, since both hide residue. Wash the keg if it is used, and sanitize it if you are putting homebrew into it.
Never pour one chemical into another to save a bucket rinse. Many cleaning and sanitizing products release dangerous gases when mixed. Work in a ventilated space, wear gloves, and follow each label’s contact time exactly. Success is a line that runs clear, smells neutral, and has been rinsed.
Step 3: Install the CO2 Cylinder and Regulator
Set the cylinder upright where it can stand or be clamped securely, away from anything that could tip it. A full cylinder carries real stored energy and a falling cylinder is genuinely dangerous. If it lives inside the cabinet, strap it so a door slam cannot knock it over.
Attach the regulator to the cylinder valve and hand-tighten the nut, then snug it with an adjustable wrench. Set the outlet pressure to zero before you open the cylinder valve, then open the valve slowly. The gauge should read cylinder pressure, typically in the hundreds, and the outlet gauge should hold near your setting.
Start around 10 psi for a cool lager or a light craft beer, then adjust from what you pour. Run a short length of gas line from the regulator output, push it fully onto the barb or threaded nipple, and secure it with a clamp. Tighten until it is snug, not until you can crush the line — over-tightened clamps split gas tubing and cause slow leaks that are miserable to find.
Brush soapy water over every connection and open the valve a crack. Bubbles mean a leak; tighten slightly and retest. Success is a steady reading and no foam at any joint. Close the cylinder valve whenever the system is not in use.
Step 4: Connect the Beer Line and Faucet
Route the beer line from where the coupler will sit, up through the wall or door, to the faucet shank. Keep the run as straight as you can. Kinks and tight bends restrict flow even when the line is the correct length.
Push the line fully onto the faucet’s barb or the shank inlet and clamp it. Attach the faucet from the inside of the door using the supplied gasket, shank and nut, tightening in a cross pattern so the seal seats evenly. A shank that is too long or too short will either not seal or will not reach the coupler.
Slip the other end of the beer line onto the coupler’s beer outlet and clamp it. You are aiming for an airtight seal; run the same soapy water check on both new joints. Hand-tighten the retaining nut on the coupler inlet snugly. Success is a firm, leak-free joint and a faucet that does not swing loose when you pull a mug away.
Step 5: Insert and Tap the Keg
Lower the keg into the cabinet with the coupler end up, so the coupler sits higher than the liquid outlet inside the keg. This reduces the foam you get on the first pour.
Fit the coupler to the keg. With a lever-handle S-type coupler, pull the handle up and out, push the coupler down onto the two keg valves, then push the handle back down and in until it locks. Ball locks work the same way with their two levers.
Check the alignment of the gas inlet, the beer outlet and the faucet shank. If any of the three is not lined up with its connection, close everything and start that joint again — a half-seated coupler is the most common cause of a system that will not pressurise.
Connect the gas line to the coupler inlet and the beer line to the outlet, then set the regulator to your serving pressure. Open the cylinder valve last. If you open it first, pressure pushes through an unsealed system and you get gas where beer should be.
Take the first test pour over a bucket. If the faucet will not open or the coupler will not release, close the cylinder valve, pull the pressure down until the gauge reads zero, and only then try again. Never work on a coupler under pressure.
Step 6: Chill the Kegerator and Make the First Pour
Let the cabinet drop to serving temperature and wait for the keg itself to reach that temperature inside. A cold cabinet does not mean a cold keg, and warm liquid foams no matter how well the system is balanced. A day of settling is the usual advice; overnight is better.
Open the cylinder valve and let the keg pressurise gradually rather than cranking the regulator up and opening the tap immediately. Fill a pitcher from the faucet first and let it run out. That first pour runs foamy by design — it is pushing air and yeast out of the lines.
Pour the pitcher slowly, hold the glass at an angle, and start low on the faucet. If foam keeps coming after the pitcher is full, work through the fixes below in order rather than adjusting everything at once. Success is a glass that stays full to the rim with a tight head that settles in under a minute.
Common Mistakes and Quick Fixes
The beer comes out flat
Check the gauge first, because a coupler that has slipped off the gas inlet pressurises nothing. If pressure reads correctly and the pour is still flat, the keg itself may have lost its carbonation — this happens, and it is not always your setup. A keg that has gone flat after sitting can sometimes be recovered by chilling it thoroughly and letting it sit under pressure for a day or two.
Too much foam
Temperature first, then line length, then pressure. Cold beer at the right pressure pours clean; a line shorter than the recommended length pours fast, which makes the beer look like foam no matter what the gauge says. Lowering pressure a few psi can steady a short line, and flow control on the faucet does the same job without touching your gas settings. Pouring into a cold, clean glass cuts foam too.
Weak or absent pour
Almost always a restriction. Check that the coupler is fully locked and the faucet’s flow restrictor or strainer is not blocked with dried yeast from an unclean line. Confirm the beer line is not kinked where it passes through the wall. If the faucet opens but nothing comes out, walk the line and look for a crushed section.
Leaking coupler or faucet
Shut the cylinder valve, release pressure, and reseat the coupler. Couplers seat when pushed firmly with the handle in its locked position; a coupler that looks closed but sits high is a common sight. For a dripping faucet, check the gasket and shank nut first, then the flow control collar if you have one.
Temperature will not hold
An empty cabinet cools faster than a full one, so test before blaming the appliance. Leave space around the keg for air to move, keep the door closed, and give the cabinet a full day with a loaded keg before judging it. A fridge whose door shelf interferes with the door closing is not sealed and will never hold temperature.
Off or bad flavours
Cleanliness accounts for most of these. A line that was rinsed but not sanitized will give you off flavours within a few pours. Also check that no cleaning product residue is left in the lines by skipping the final rinse.
Hissing from the cylinder
That is usually a leak downstream, soapy water finds it quickly. Where the hiss continues from the regulator itself or the cylinder will not shut off cleanly, stop using the system and take the cylinder to an exchange point. Any change to electrical, structural or gas work beyond your own connections belongs with a qualified technician or your appliance’s service agent.
Frequently Asked Questions
What pressure should I use for a beginner kegerator?
Start at about 10 psi for most beers and adjust from there. Light lagers and pilsners pour well between 8 and 10 psi, while heavier ales and highly carbonated styles often want 12 to 14 psi. Pour pressure and carbonation pressure are different things: breweries typically carbonate around a level equivalent to 14 psi, then serve lower. Change pressure in 1 to 2 psi steps and pour after each change.
How cold should a kegerator be for draft beer?
Most draft beer is served between 34 and 38 F, which is the range that keeps foam under control. Standard lagers and pales sit near 36 F, IPAs and other hop-forward beers are usually a little warmer at 38 to 40 F, and stouts and porters serve fine around 40 to 44 F. Going colder does not improve the beer, and a set that runs too cold can cause the lines to freeze.
Do I need a beer line for a single-tap kegerator?
Yes. The line from the coupler to the faucet is what slows the beer down and is usually your biggest lever against foam. The tubing that comes with a new tower is often far shorter than what a well-balanced system needs, and a too-short line is the leading cause of gushing pours. Run as much clean, kink-free line as your cabinet allows, then trim from the end if it does not sit right.
How do I fix a kegerator that pours too much foam?
Work through the causes in order: temperature, line length, pressure, then pouring technique. Make sure the keg has been cold for a full day, not just the cabinet. Check that the beer line runs the length recommended for your tap height. Drop pressure a few psi, or use a faucet with flow control to slow the pour. Always pour into a cold glass held at an angle.
Can I use a sodastream-style CO2 cylinder?
Only if it is a genuine beverage-grade cylinder with a CGA-320 valve outlet, because the regulator must match the connection. Many home soda cylinders are not rated for the pressures a regulator delivers and some are not food-grade, so they are not a safe substitute. Buy cylinders marked beverage-grade from an exchange supplier and check that the outlet fits your regulator before you commit.
How often should I clean and sanitize a kegerator?
Clean the lines every time you change kegs, and at minimum once every couple of months even if you keep the same beer flowing. Sanitize after cleaning before every fresh keg goes on. The coupler, faucet and keg interior all need attention too. If lines dry out between uses, clean them right away, since dried residue is far harder to remove than fresh residue.
Start With the Pressure, Not the Pour
Do the fridge, the cleaning and the CO2 connection first, in that order, and leave the temperature adjustment until the system is sealed and leak-free. If you only remember one thing from a kegerator setup for beginners, remember that the regulator gets pressurised before the keg gets tapped, and that a soapy water check on every joint saves an afternoon of guessing later. Once the first pour comes out flat and cold instead of warm and foamy, you are done.